You have a couple of options that you need to fill up before you start using Elemailer for your marketing campaign.
These settings are considered as basic settings/root level settings of which many can be overridden in Email specific level when you create email templates or start a new campaign.
To get started head over to wp-admin> Elemailer > Settings. You will see multiple tabs. Lets learn what they do.
Basic Option #
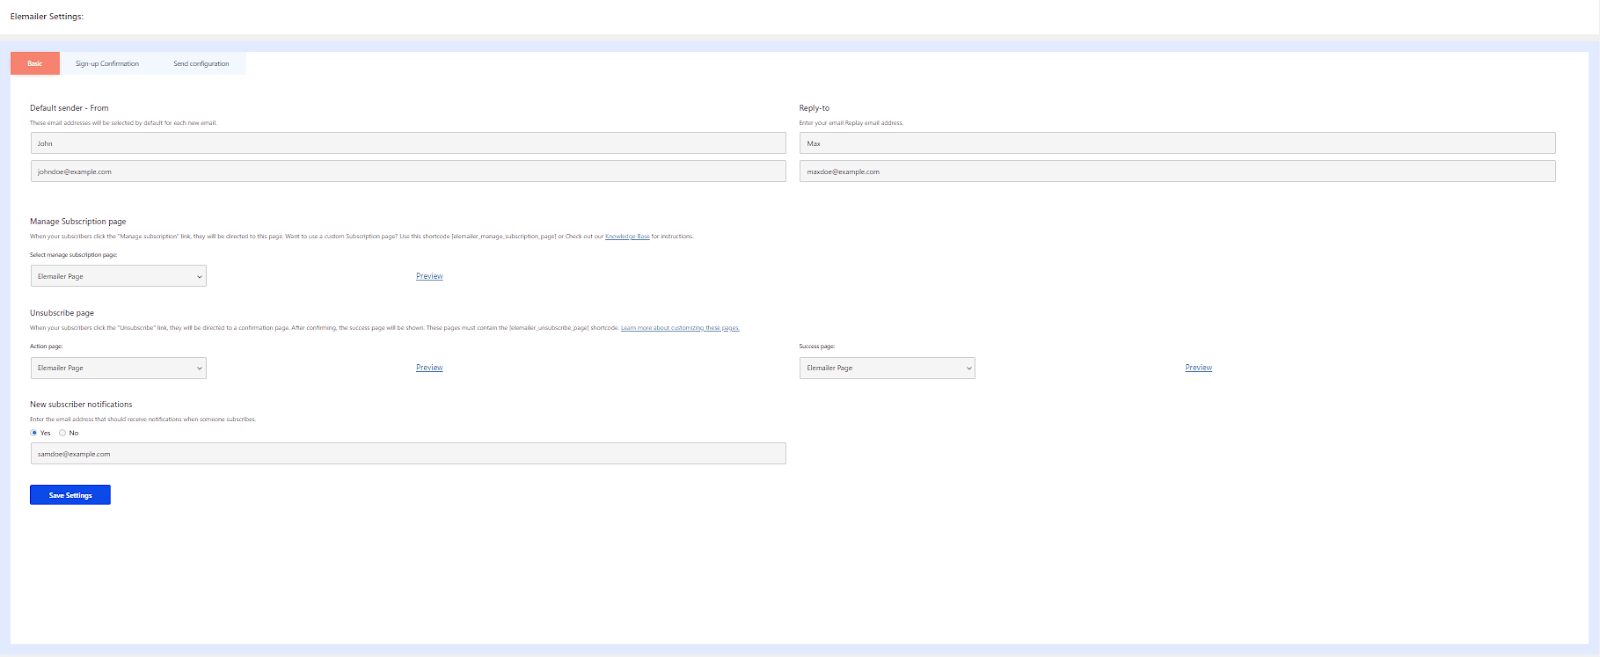
- Firstly, you will have to add a name and email in the Default sender – From section. These email addresses will be used by default for each new email. Ofcourse you need to make sure your email is added to your WordPress site and authenticated to send email. Using any SMTP plugin is a good idea in this case. Because without SMTP your emails might just end up in spam.
- Then, on the right side you will see a Reply-to option. This would be the email users will see to reply to when they receive your emails or campaigns.
- Next step, select a Manage Subscription Page. (When your subscribers click the “Manage subscription” link in their email that they receive ( if you add it in footer ), they will be directed to this page. ). You can either keep using the default Elemailer Page as the option or select any individual page which you designed and that has the shortcode [elemailer_manage_subscription_page]
- Next select a Unsubscribe Page & Success page. When your subscribers click the “Unsubscribe” link in the email ( if you add it in footer ), they will be directed tot this page. You can either keep using the default Elemailer Page as the option or select any individual page which you designed and that has the shortcode [elemailer_unsubscribe_page] . For the success page you can keep using the default Elemailer page or simply design one yourself and select it in the option.
- Further, in New Subscriber notifications – This is an admin focus setting. Click on Yes or No and Enter the email address that should receive notifications when someone subscribes.
- Click on Save Settings to save your changes done on the page.
Sign-up Confirmation / Double opt-in Option #
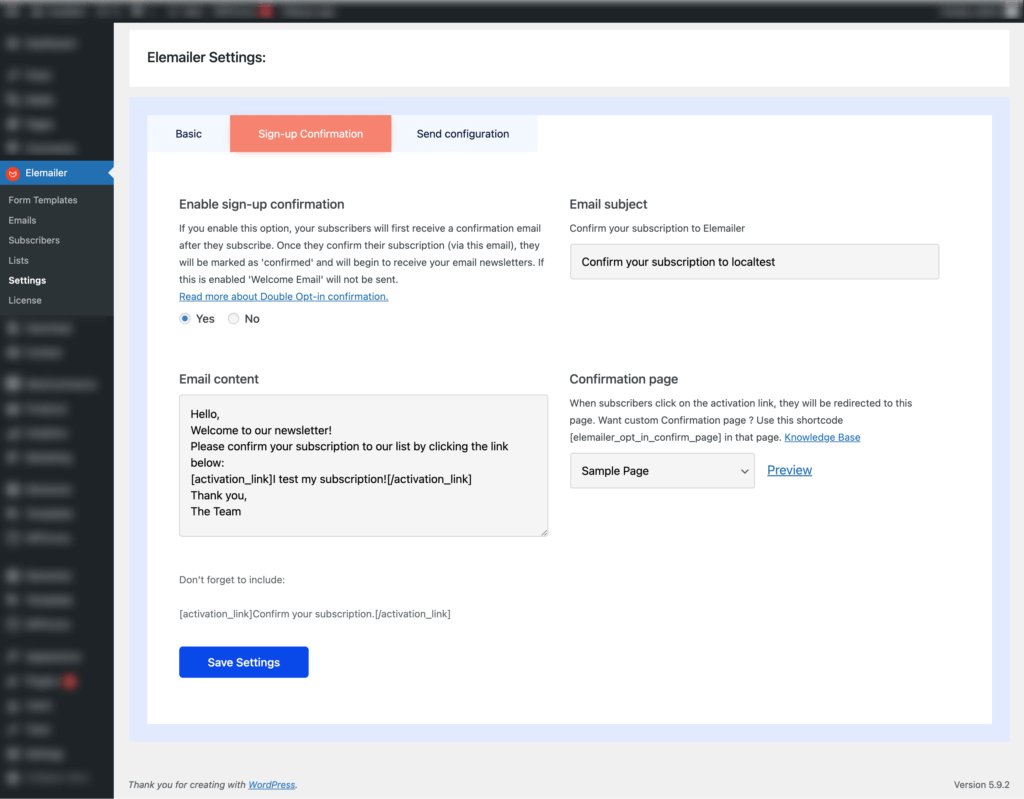
- Choose yes or no for signup confirmation. If you enable this option, your subscribers will receive a confirmation email after they subscribe. Once they confirm their subscription, they will be marked as ‘confirmed’ and will begin to receive your email newsletters if you send out to them. If this is enabled – ‘Welcome Email’ will not be sent out as well.
- Next, You need configure an Email subject. Example: Confirm your subscription to Elemailer.
- The next step is to write Email Content. (Example shown in the image below). Also, don’t forget to include [activation_link]Anything you write here will become a link Confirmation your subscription[/activation_link]
- Next, select a Confirmation Page.
- You can keep using the Elemailer Page option to show the default one or design any page > Insert the dedicated shortcode – [elemailer_opt_in_confirm_page] there which will show different output for the subscription confirmation and then select that as well. When subscribers click on the activation link when they receive the opt-in email, they will be redirected to this Confirmation page.
- The shortcode [elemailer_opt_in_confirm_page] supports Various inputs for you to be able to change what text is shown or remove some fields with empty input when a Subscription is confirmed, Invalid, Already subscribed. Example: [elemailer_opt_in_confirm_page subscribed_heading=”Thank you for subscribing!” subscribed_sub_heading=”This is the subheading”].
- The Confirmation Page shortcode’s Supported parameters are listed below. All the fields are translation ready –
subscribed_heading = "Thank you!"
subscribed_sub_heading ="You have successfully confirmed your subscription."
already_subscribed_heading = "Opps! You already subscribed once."
already_subscribed_sub_heading = "This link is one time use only. The link is expired!"
invalid_heading ="Opps! This is odd!"
invalid_sub_heading ="Maybe your token is not valid or you are not our subscriber."
- Click Save Settings to save the changes.
Send configuration Option #
Sending Frequency #
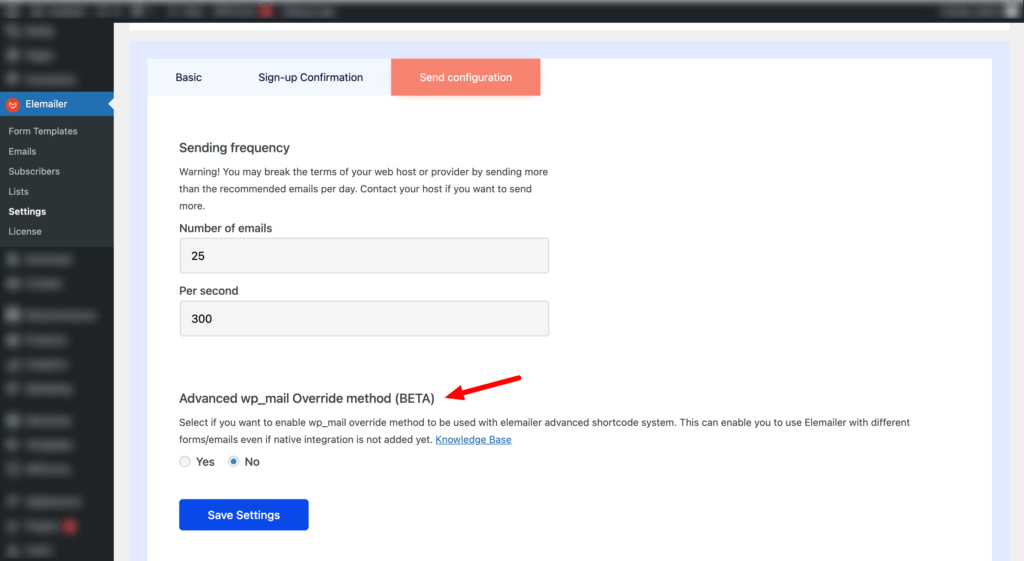
This section lets you define some sending configurations for your email campaign. Please make sure you are using a configuration that is accepted by your hosting as well as your mail server / SMTP provider.
- Here you need to insert the Number of emails /per second.
- Click on Save Settings to save changes.
Advanced wp_mail override method #
In send Configuration, Elemailer offers you the option to enable the Advanced wp_mail override system with Elemailer’s special patterned shortcode. This can be useful if there is still not a native integration for any 3rd party plugin where you want to use the Elemailer template with its shortcode. This works by overriding all the content of wp_mail where added and only giving elemailer template data and the dynamically mapped data ( if any such as field data from different forms ). Only enable this option if you need to use Elemailer where the integration is not yet natively added.
We have made it easy for you to generate the shorcode with floating UI on the right of your elemailer screen when you enable the option –
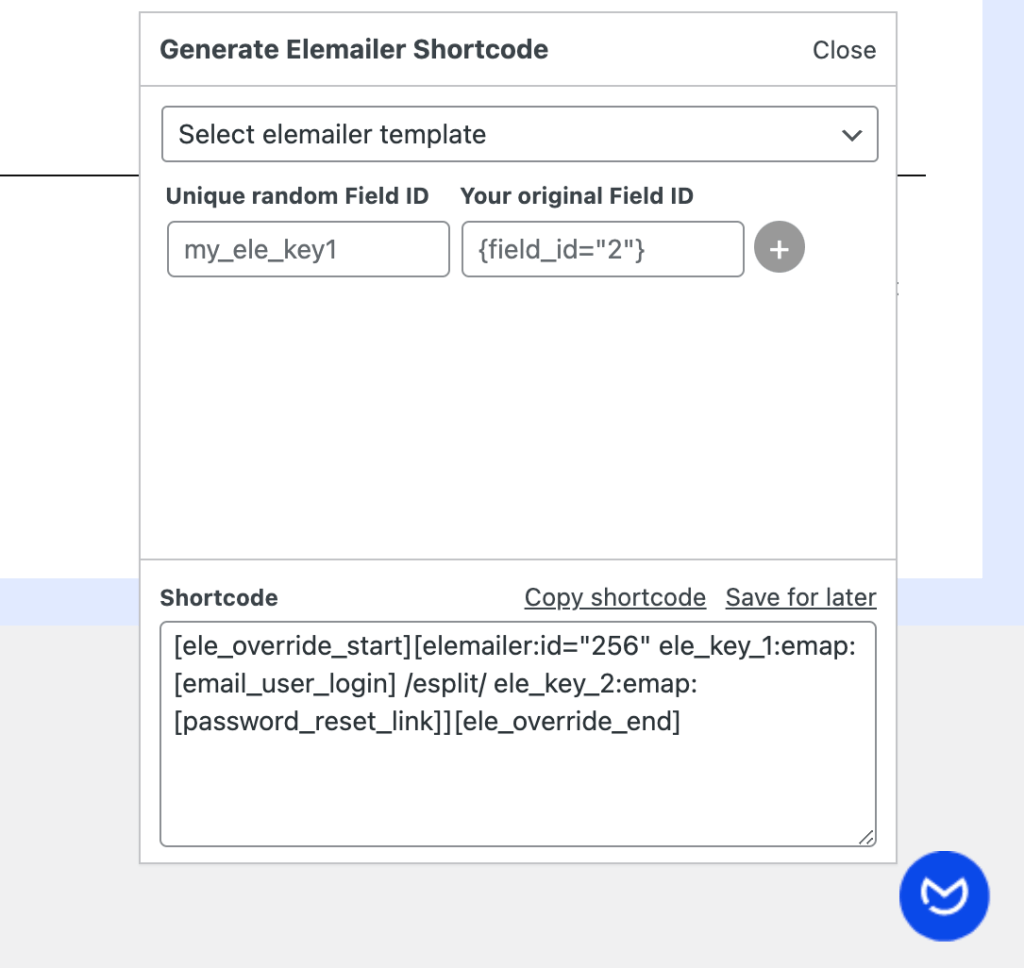
Example Shortcode pattern – (everything in bold must be there and other parts can be replaced, or removed as needed). There should be no extra spaces left here and there
[ele_override_start][elemailer:id="244" anyid1:emap:{anyform_field_id="0"} /esplit/ anyid2:emap:{anyform_field_id="1"}][ele_override_end]


Explanation:

   1. We get shortcode when we create any Elemailer template and that looks like this - [elemailer:id="244"] . The id will be different depending on the template ofcourse.

   2. IMPORTANT: When we need to use this advanced method to override wp_mail content with Elemailer template we need to wrap our Eleamiler given shortcode inside the [ele_override_start] [ele_override_end] tags. Also, there should be no extra spaces left

Inside the shortcode itself (i.e: [elemailer:id="244"] ) in this case two more parameters are supported which will help you pass dynamic data to any field id of your choice from any form/email system's offered shortcode/tags.

   3. :emap: tag is used to map two fields. On the LEFT side of :emap: your any random defined field id ( make sure it's unique such as elemailer_anything_field_1 ) should be given and on the right side any dynamic field id offered by your form/module should be there. For example in WPforms it looks like this {form_field_id="0"}, for contact form 7 they look like this [your-name]. So our mapping would look like this - elemailer_anything_field_1:emap:[your-name]

  4. /esplit/ is used when you need to add multiple dynamic field with :emap: tag. So you can map really any number of fields with /esplit/ tag in between them just like the above example.