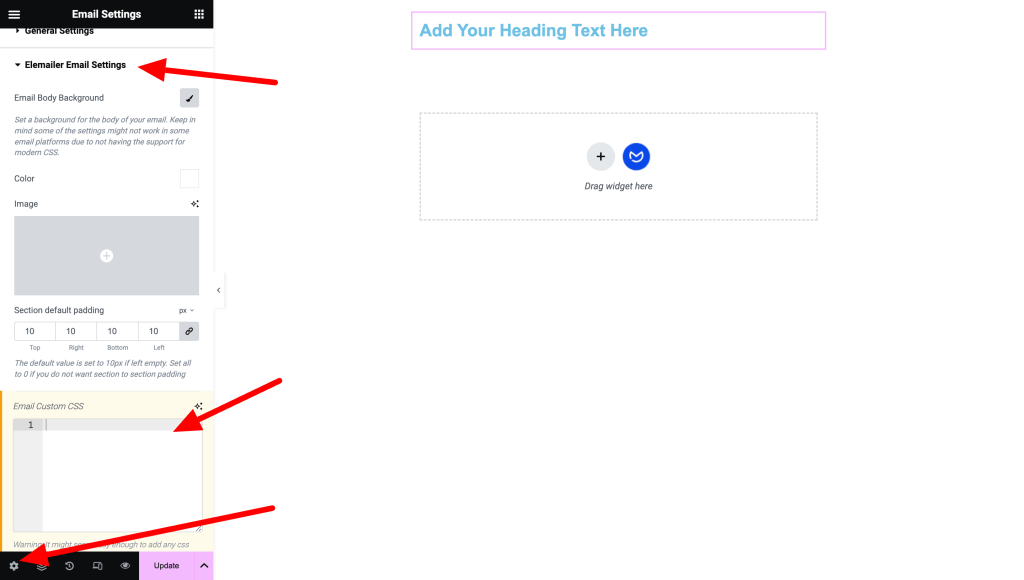
Elemailer provides you the method to put any custom CSS you want into your email templates.
You can find the Custom CSS panel of Elemailer if you navigate to the gear icon on the bottom left of the email template screen > You will see the Elemailer Email Settings tab > Under it, find the Email Custom CSS tab, where you can insert any custom CSS.
How to target specific widgets with Custom CSS? #
Move to the Style tab > Advanced Style tab of the desired widget that you want to target with Custom CSS. Find the CSS class text box there and add your class name. You can add multiple class names as well with space. Make sure not to add any dot ( . ) in the class names.
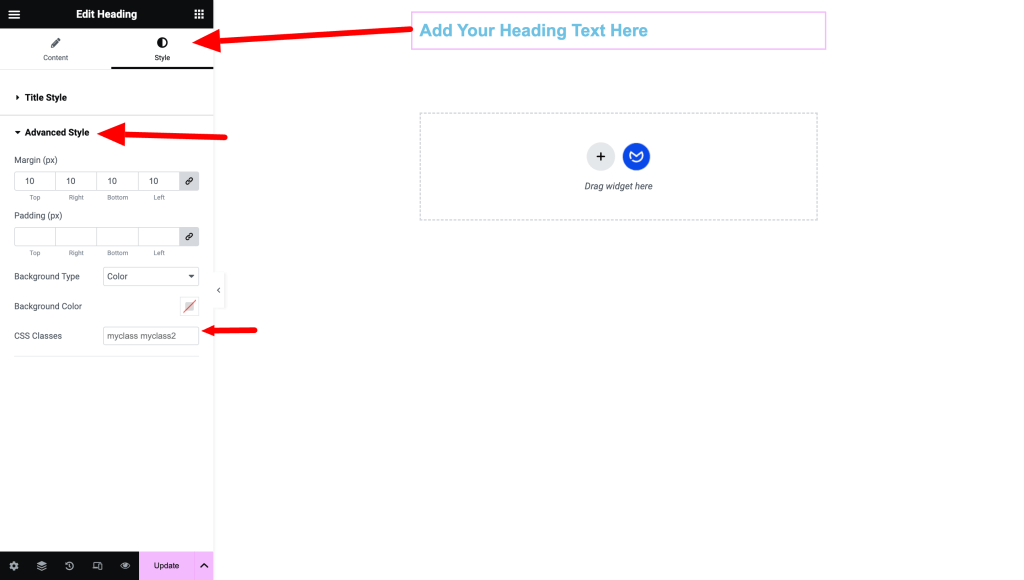
After the custom class is done, remember/ copy that class name and then use that class name in the custom CSS tag to target and change style.
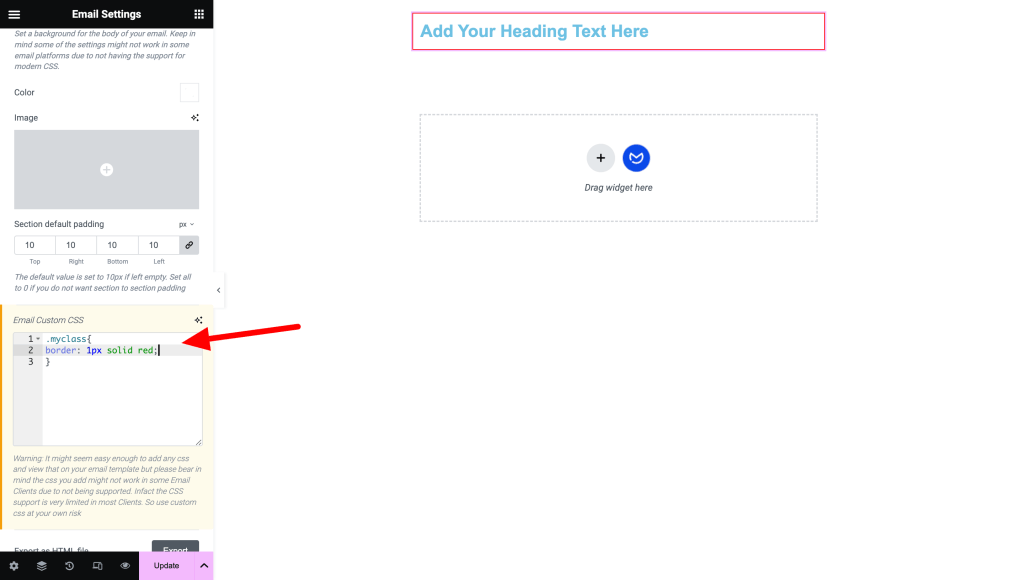
Note, if you don’t target specific inner elements such as h1, p, etc, properly, the custom CSS might not take effect. To find out what element you need to target in your case, you can simply use Chrome/firefox inspect Element option/ developer tool option and inspect the code. In the below screenshot, you can see that our custom CSS class myclass is available, but to change color with it we will have to use CSS targeting child classes/elements with it, meaning the CSS would look like this:
.myclass h2{
color:red!important;
}
We needed to use important here because from screenshot you can see that the style that is applied here is a inline style.

Save your email template and check by sending a test email to confirm everything works as expected.
Note: When you add custom CSS, do check if the email platforms support those custom CSS as many email platforms don’t support many custom CSS to begin with. Custom CSS issues are out of our support scope.


