An welcome email is the company’s initial impression with a new client or newsletter subscriber, or blog subscriber. Special offers, videos, a sign-up form, or just a pleasant greeting may all be included in welcome emails to help build up a connection with a new contact. Since these emails are delivered after subscribing to a company’s newsletter, many of them are read, and the impression they leave on the reader is what they will remember over time.
- Head over to wp-admin> Elemailer > Emails.
- Press Add new
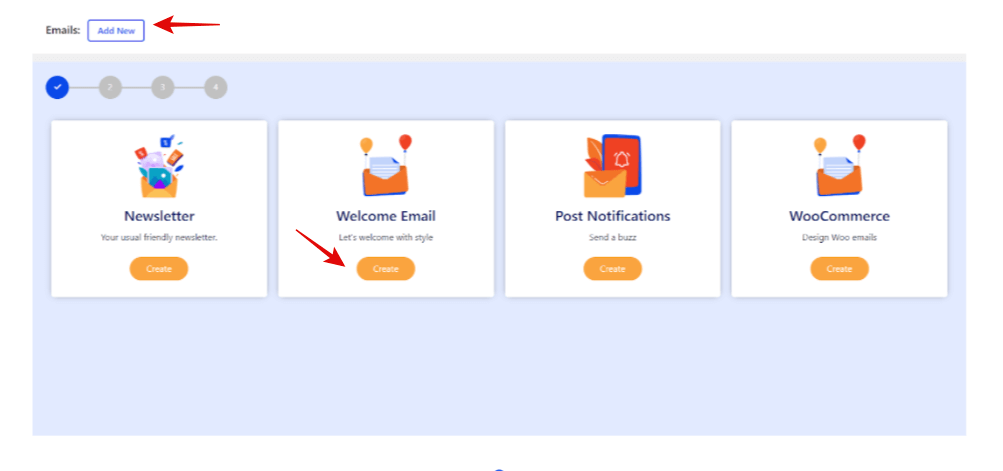
- Press the Welcome Email button
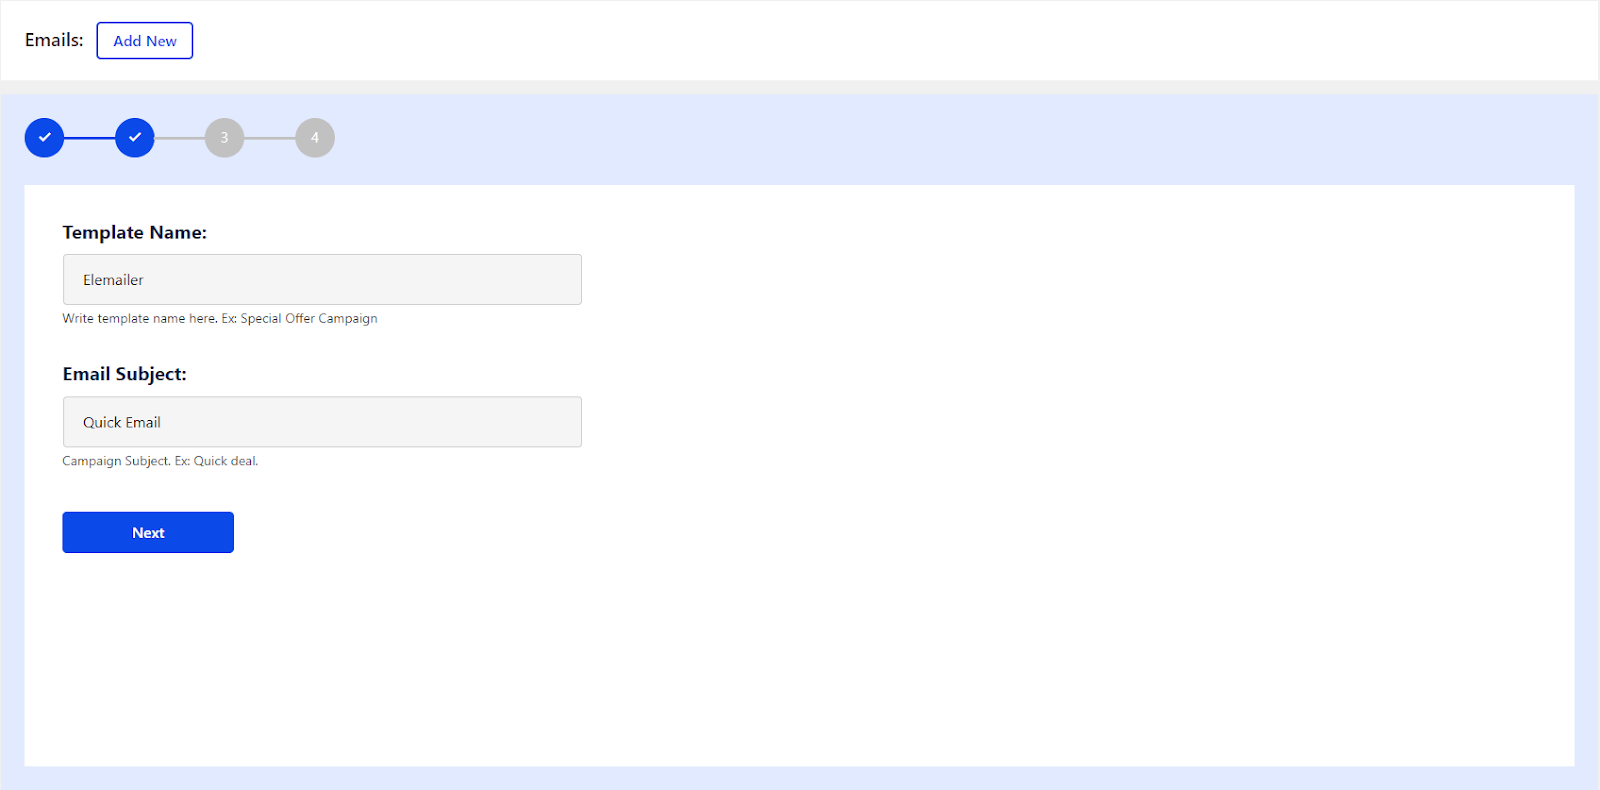
- Click on Add New tab
- Write a Template Name. Example: Special Offer Campaign
- After that add an Email Subject. Example: Quick Deal
- Click on Next
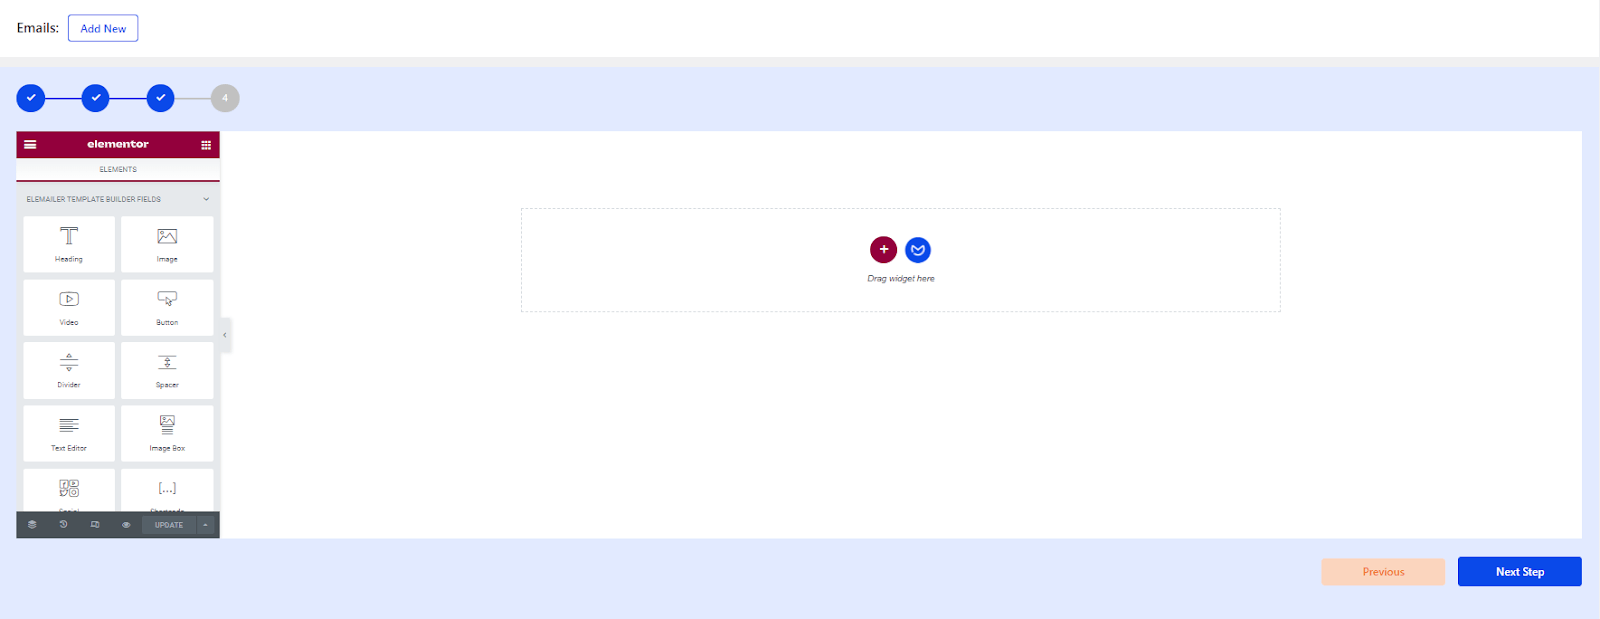
- Now you will have the Elemenetor email builder interface inside to edit your welcome email.
- You will find several widgets that you can select. Just Drag it on the right side.
- Move on to the Next Step
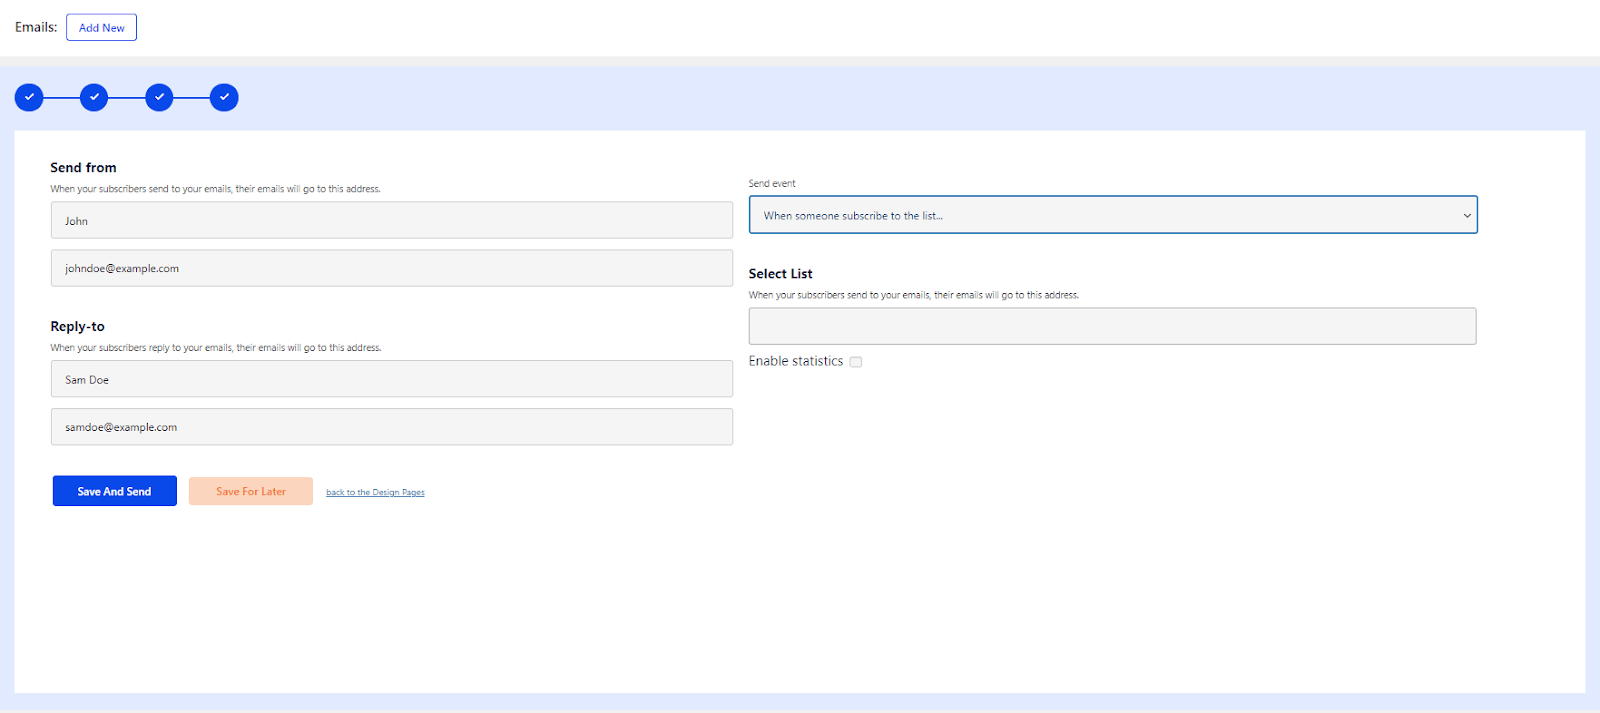
- In the Send From section: Fill the Name and Email Address.
- In the Reply-to section: Fill the Name and Email Address. When your subscribers reply to your email, their emails will go to this address.
- In the Send Event section: Select
- When someone subscribes to the list ( This will not work if you have enabled double opt in email in your Elemailer settings )
- When someone registers on the site
- In the Select List section: Here you can select the list to whom you would want to send this email if you do have the lists created
- Tick if you want to Enable Statistics.
- Click on Save And Send or Save For Later
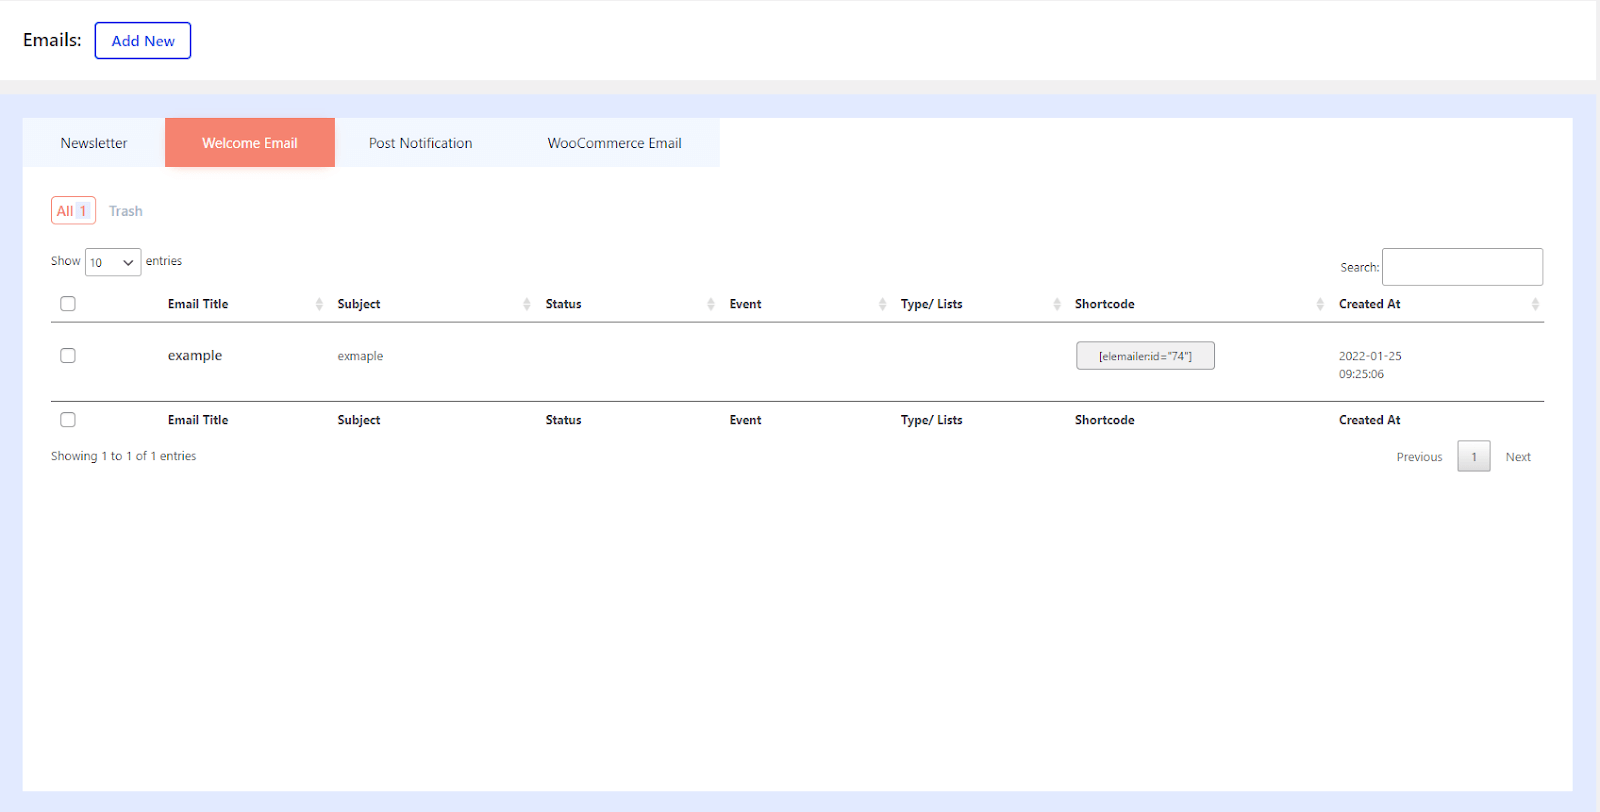
After the successful creation of your email, you should see it listed in your emails list under the welcome tab as below the screenshot.