Sending out a manual newsletter can be time-taking. Hence, use a post-notification email to notify subscribers about new posts automatically. This saves time and increases return visits.
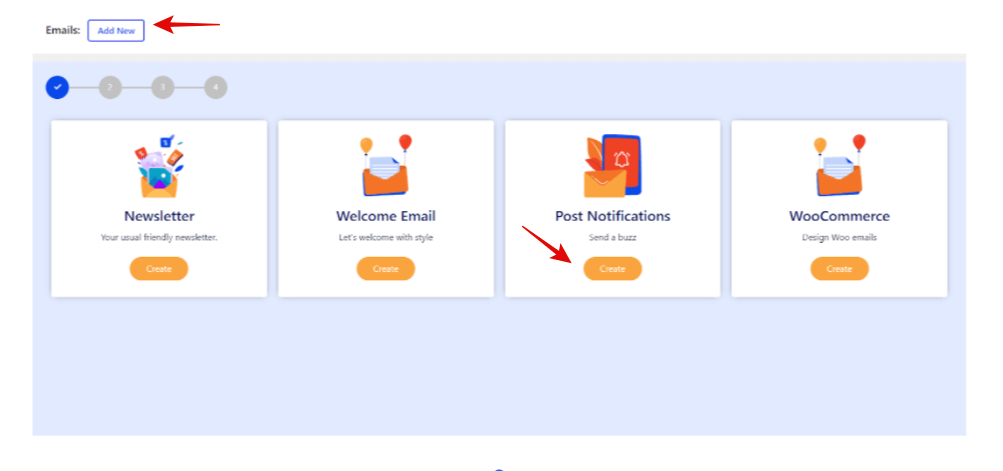
- Press the Post Notification button
- Click on Add New tab
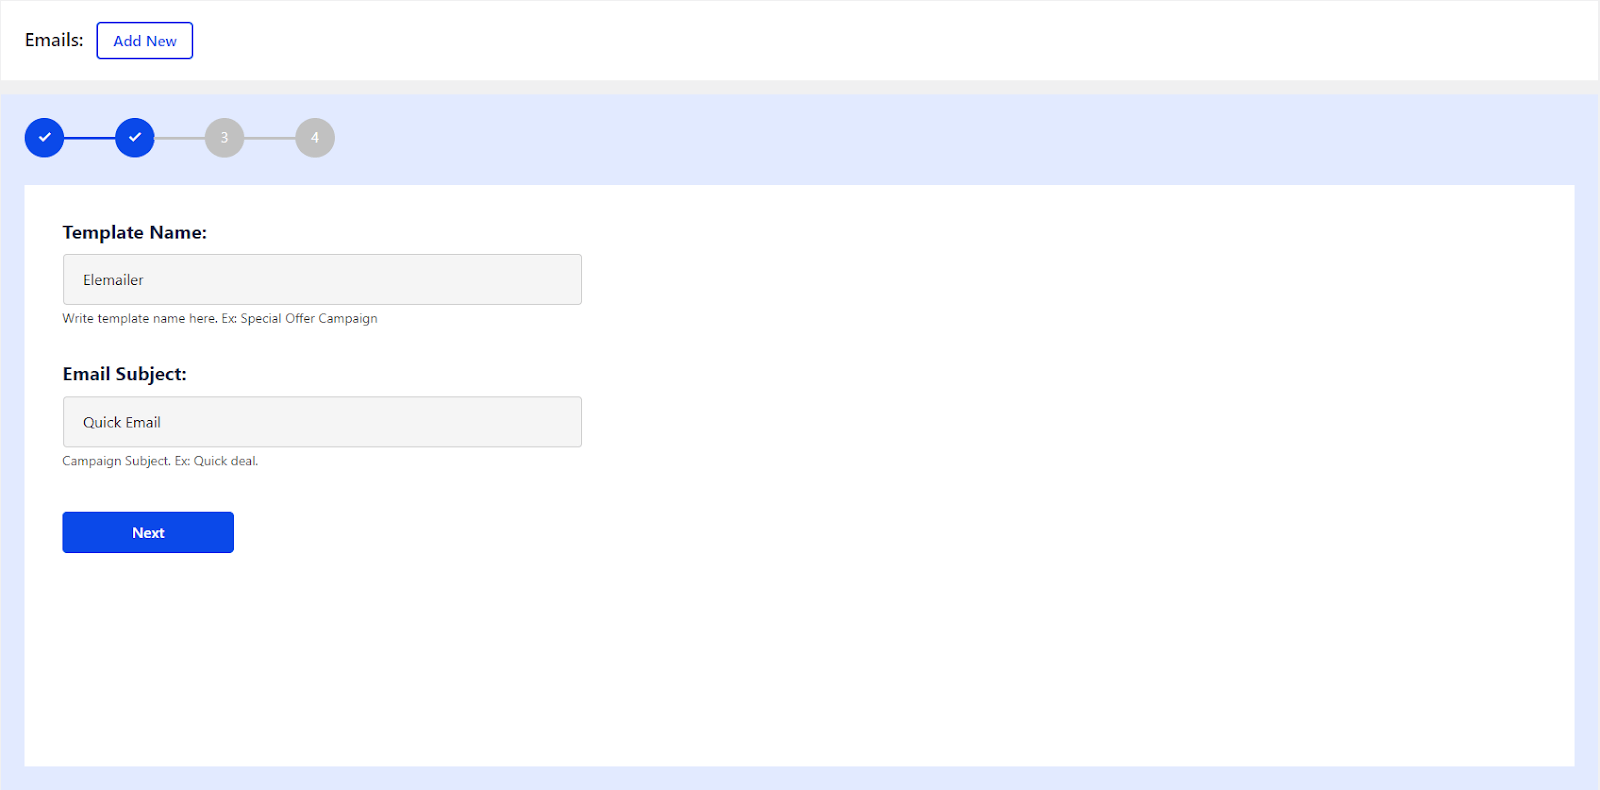
- Write a Template Name. Example: Special Offer Campaign
- After that add an Email Subject. Example: Quick Deal
- Click on Next
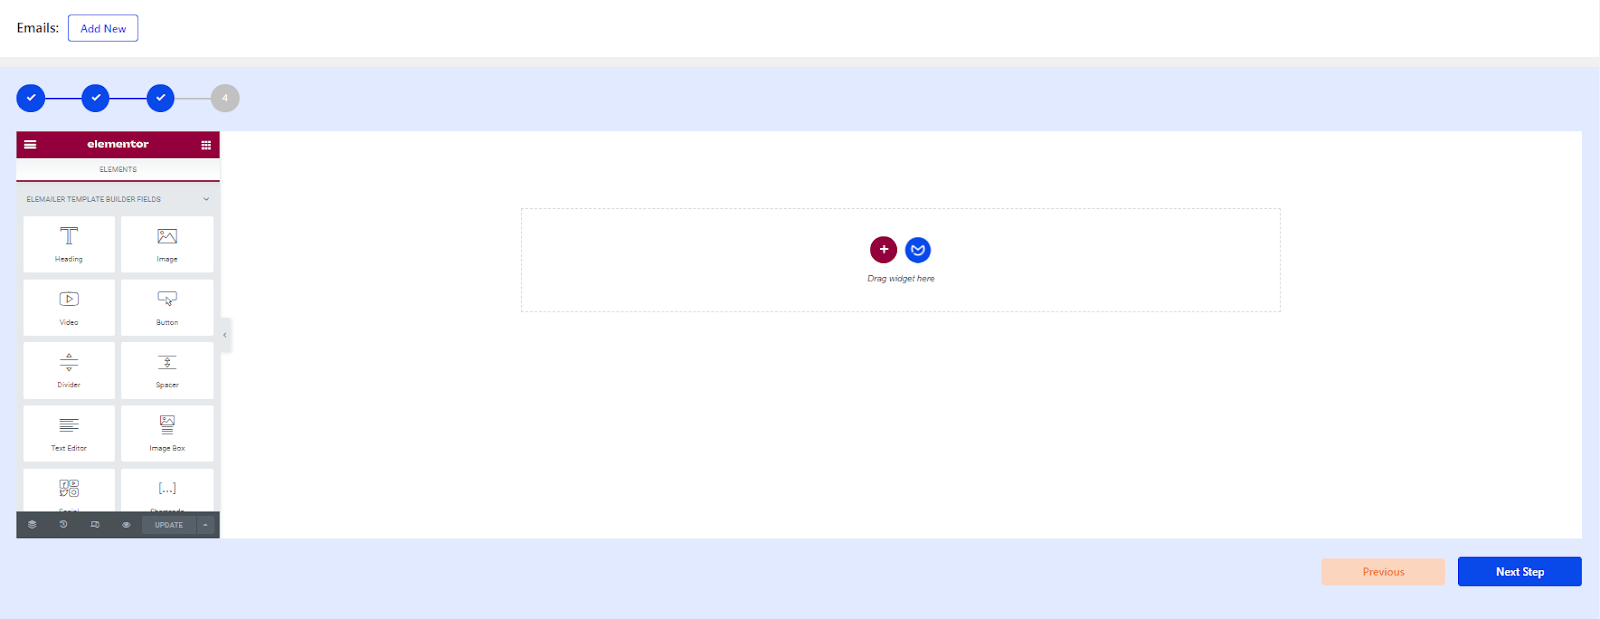
- New page will open that will include Elemailer Template Builder Fields
- You will find several widgets that you can select. Just Drag it on the white space
- Move on to Next Step
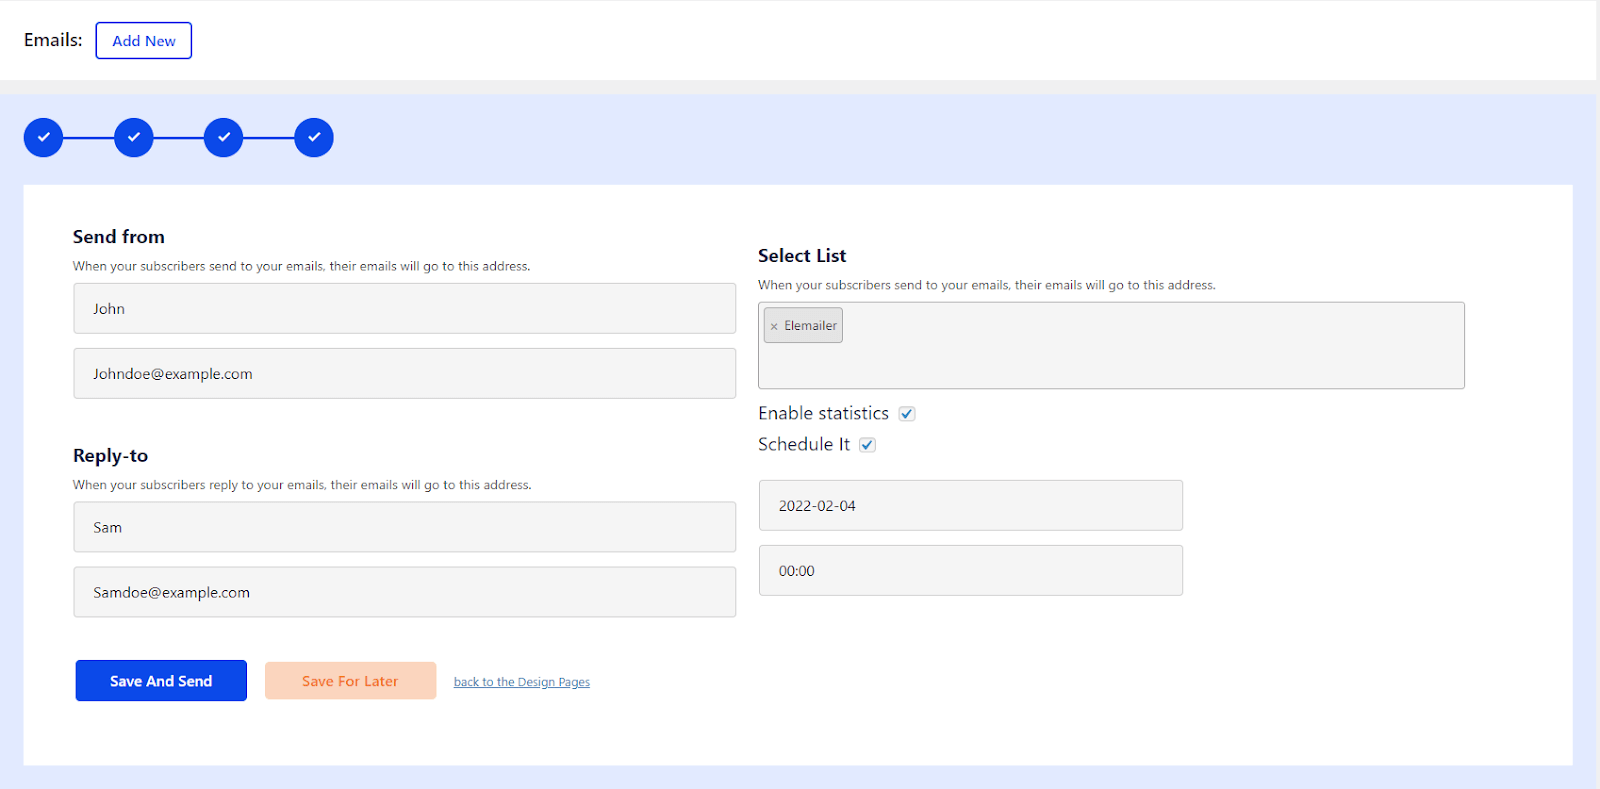
- Now comes the last step.
- In the Send From section: Fill the Name and Email Address. When your subscribers send you an email; their emails will go to this address.
- In the Reply-to section: Fill the Name and Email Address. When your subscribers reply to your email; their emails will go to this address.
- In the Select List section: Add an Email Address. When your subscribers send your emails; their emails will go to this address.
- Rest, it depends on you if you want to Enable Statistics and Schedule it. Accordingly you can tick or untick it.
- Click on Save And Send or Save For Later