With WooCommerce being a popular option to open an e-commerce store, thousands of stores across the globe use it to sell online. Set your brand apart by customizing the various WooCommerce event emails like purchase confirmation & more. Who doesn’t love a better-looking branded email, especially if they are paying to get something? Not the mention you can design these WooCommerce emails with Elementor.
Which WooCommerce Emails customization can be done ? #
📨 WooCommerce Standard Email design:
– Admin New Order Email customization
– Admin Cancelled Order email customization
– Admin Failed Order email customization
– Customer Completed Order email customization
– Customer On-hold Order email customization
– Customer Refunded Order email customization
– Customer Processing Order email customization
– Customer Note email customization
– Reset Password email customization
– New Account email customization
📖 WooCommerce Booking Email Design:
– Admin New booking Email customization
– Admin Booking Cancelled Email customization
– Customer Booking Cancelled Email customization
– Customer Booking Confirmed Email customization
– Customer Booking Notification Email customization
– Customer Booking Pending Confirmation Email customization
– Customer Booking Reminder Email customization
How to Design/Customize WooCommerce emails with Elemailer: #
First, make sure your WooCommerce plugin is installed and active.
Head over to wp-admin > Elemailer > Emails
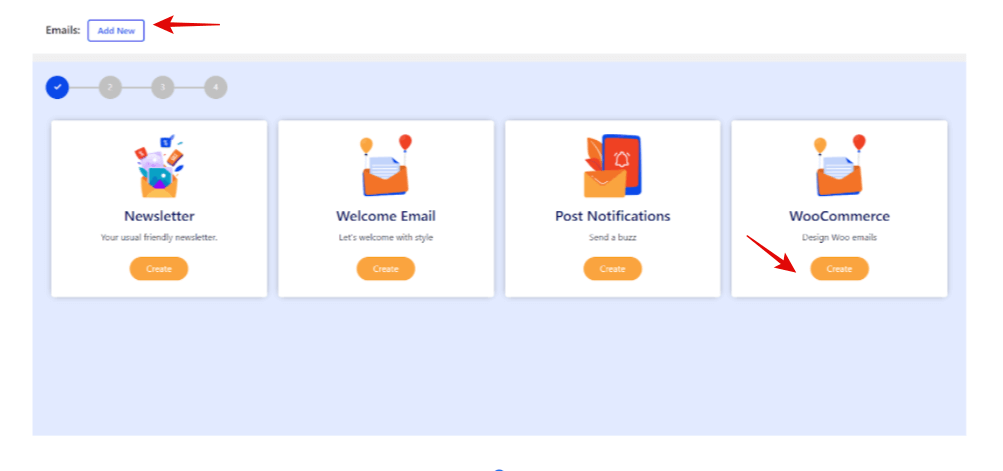
- Press the WooCommerce Email button
- Click on Add New tab
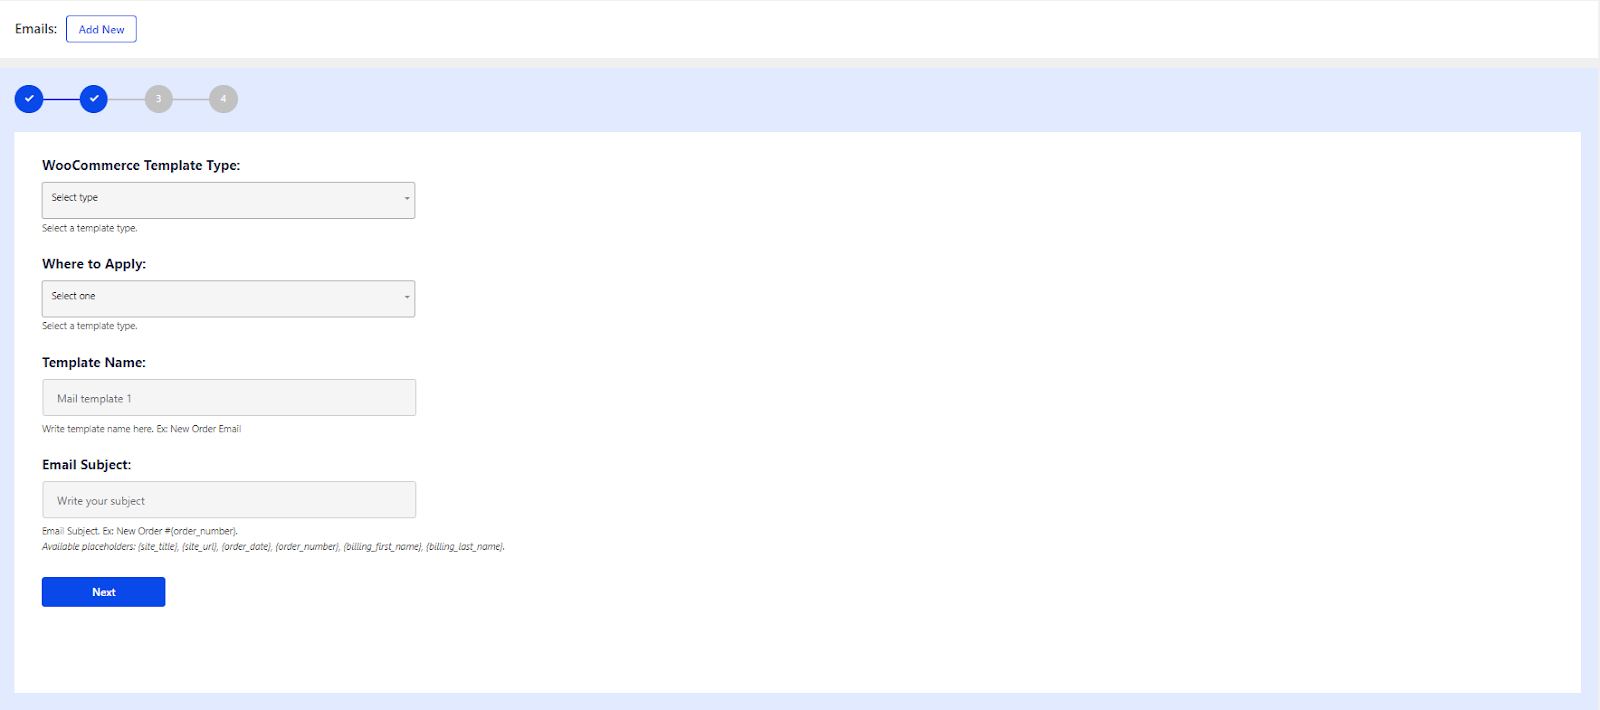
- In the next step, you will find options like: WooCommerce Template Type, Where to Apply, Template Name, and Email Subject
- WooCommerce Template Type: Select Type (can be Admin New Order, Admin Cancelled Order, Admin Failed Order, etc)
- Where To Apply: Select one out of Global(All Products), Specific Category, Specific Product
- Template Name: Fill in the Template Title/Name. Example: New Order Email
- Email Subject: Add a subject line to your email. Example: New Order #(order number)
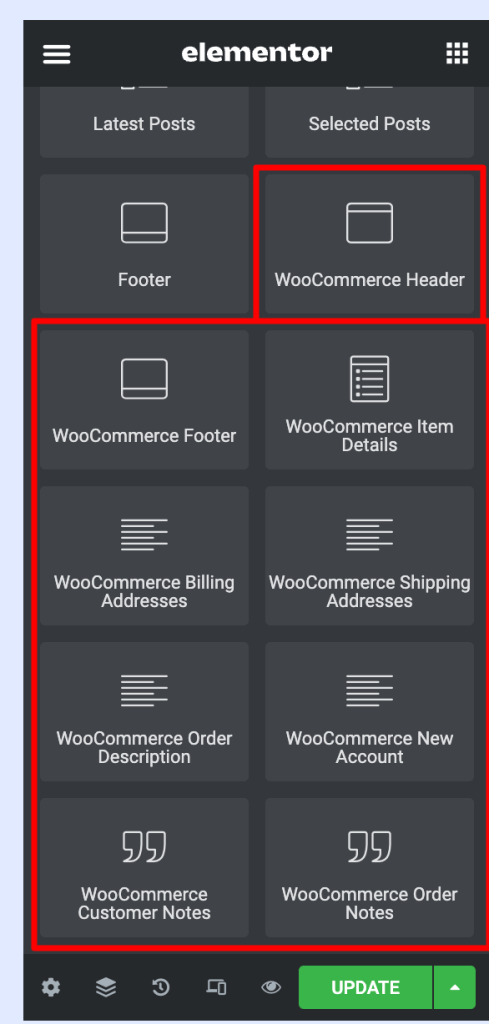
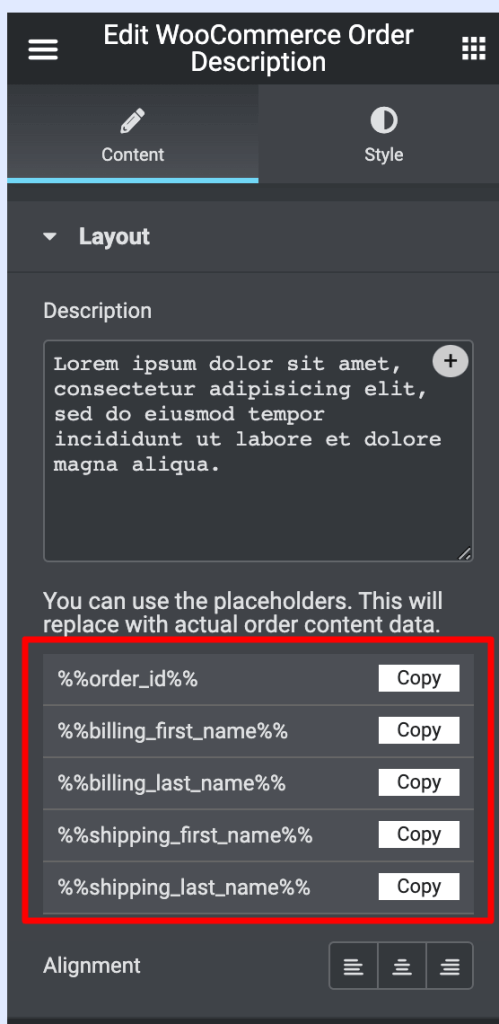
- A new page will open that will include Elemailer Template Builder widgets on left
- There are few dedicated WooCommerce widgets that you can use and also the allowed shortcodes are mentioned in those widgets ( if any )
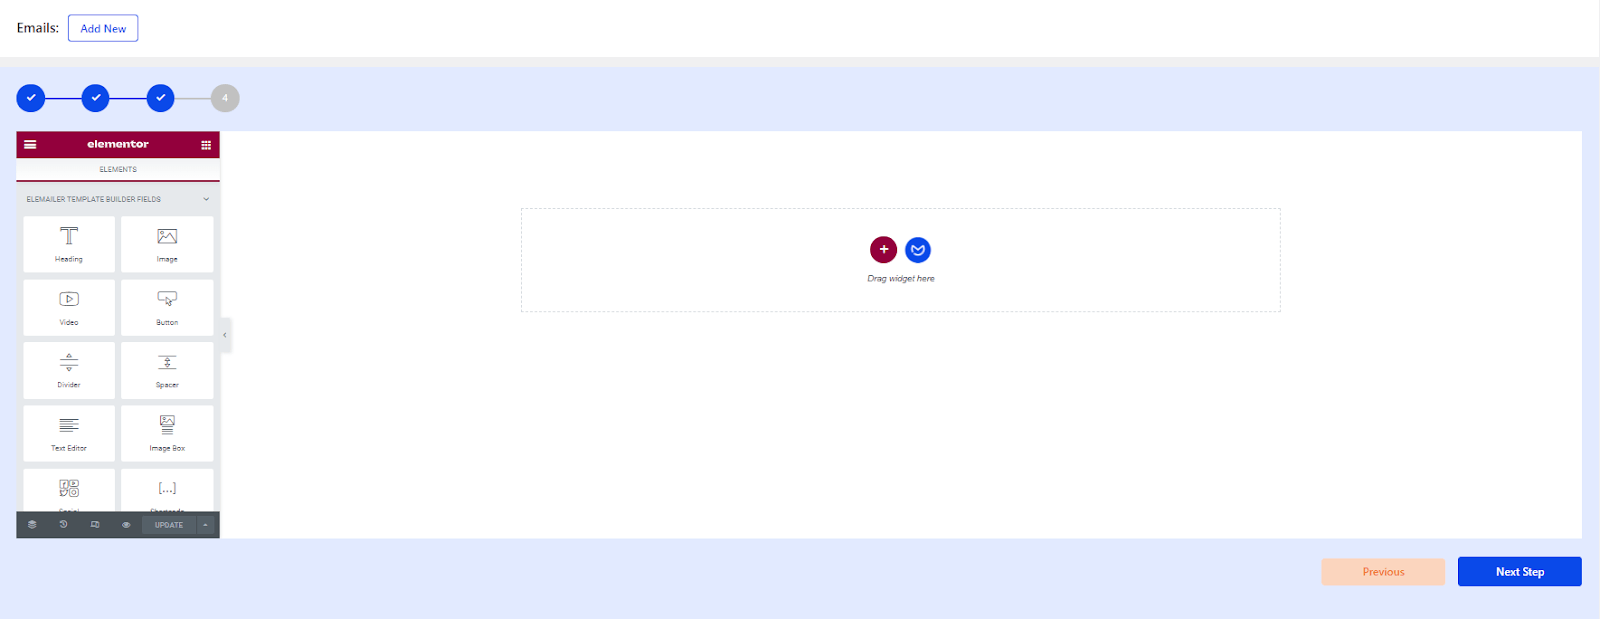
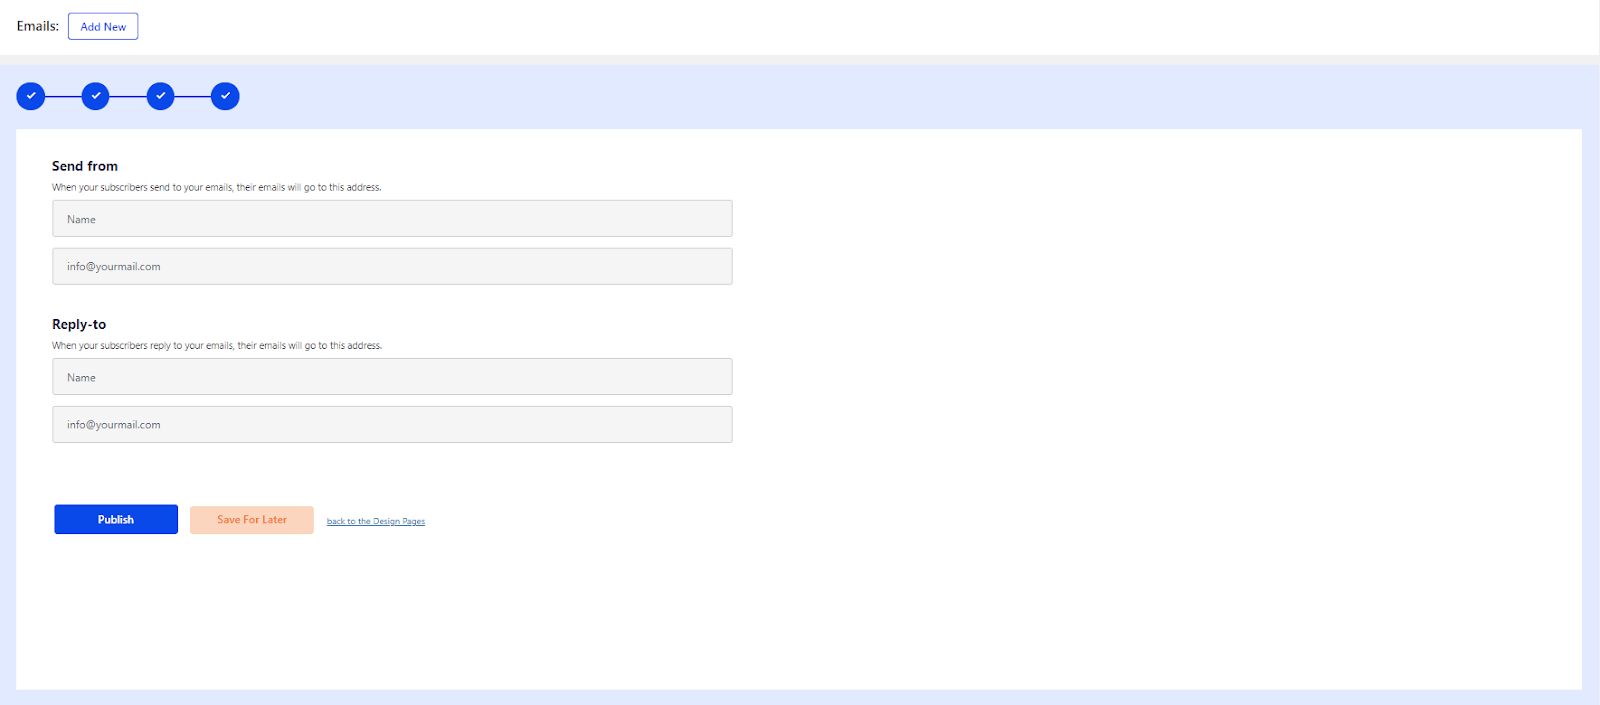
- Now comes the last step.
- In the Send From section: Fill the Name and Email Address. When your subscribers send you an email; their emails will go to this address.
- In the Reply-to section: Fill the Name and Email Address. When your subscribers reply to your email; their emails will go to this address.
- Click on Publish or Save For Later