To translate the WooCommerce Email templates that you created with Elemailer, you must make sure you have WPML configured on your site and have the WPML WooCommerce Multilingual & Multicurrency plugin installed and activated. This extension is needed to receive the language of the user on product checkout on your site. WPML Media+WPML String Translation plugin should also be there so that media translation is done when needed and to support direct string translation if you want.
1. Complete WPML setup for WooCommerce accordingly
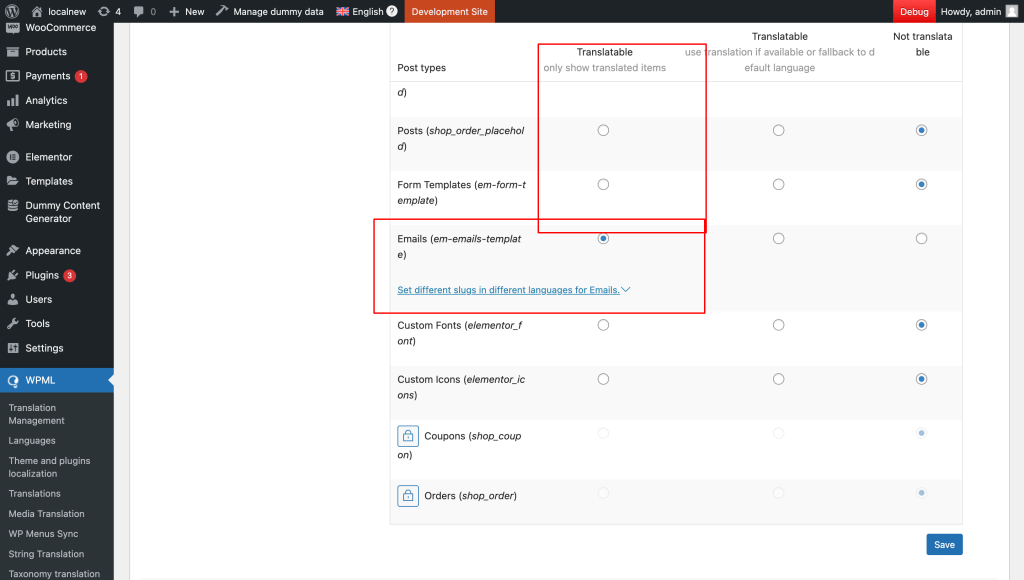
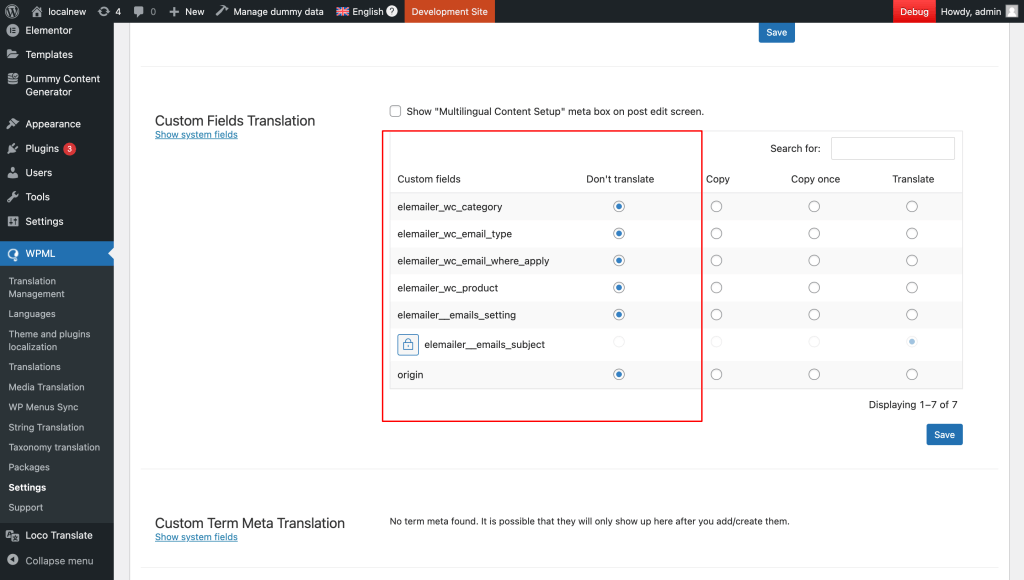
2. Select Elemailer email templates to be translated in WPML settings by going to Post Types Translation option under WPML settings & selecting Emails (em-emails-template) . Check the images to see a sample of how the configuration should look for elemailer and its related custom fields, taxonomy etc.
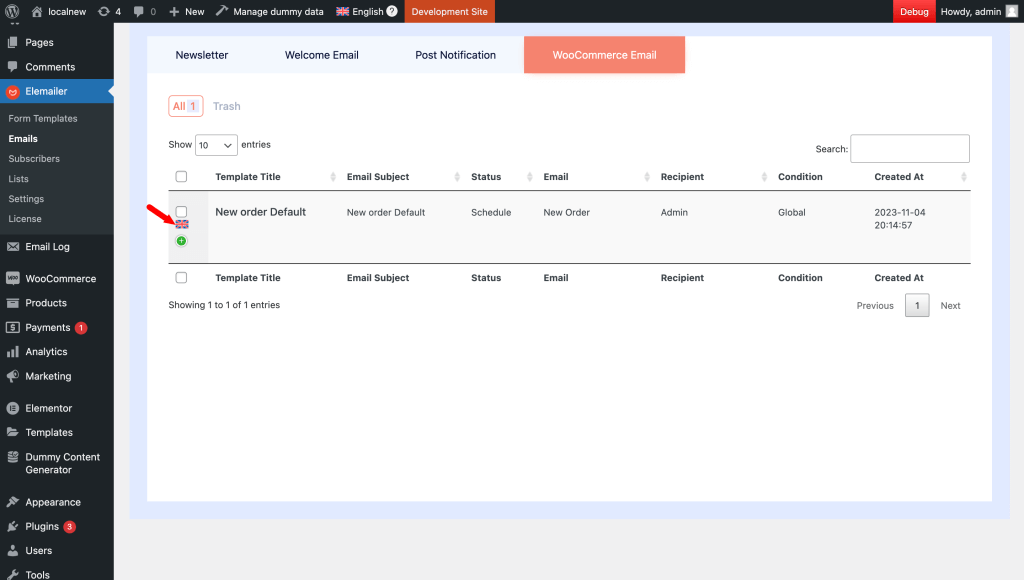
3. Now create WooCommerce email template in Elemailer if you haven’t already. You should be able to see the template’s selected language accordingly in the table view as below
4. Now let’s create a translation for this particular template that we created before. There are two ways to do this. One is by going to the WPML translation management panel and another is by going to the template itself and creating a translation for it.
4.1 ( Method 1 ) WPML translation management panel method: #
4.1.1. Open the WPML translation management panel and use the filter to easily filter out the Elemailer WooCommerce email template ( make sure to choose the proper language in your case )
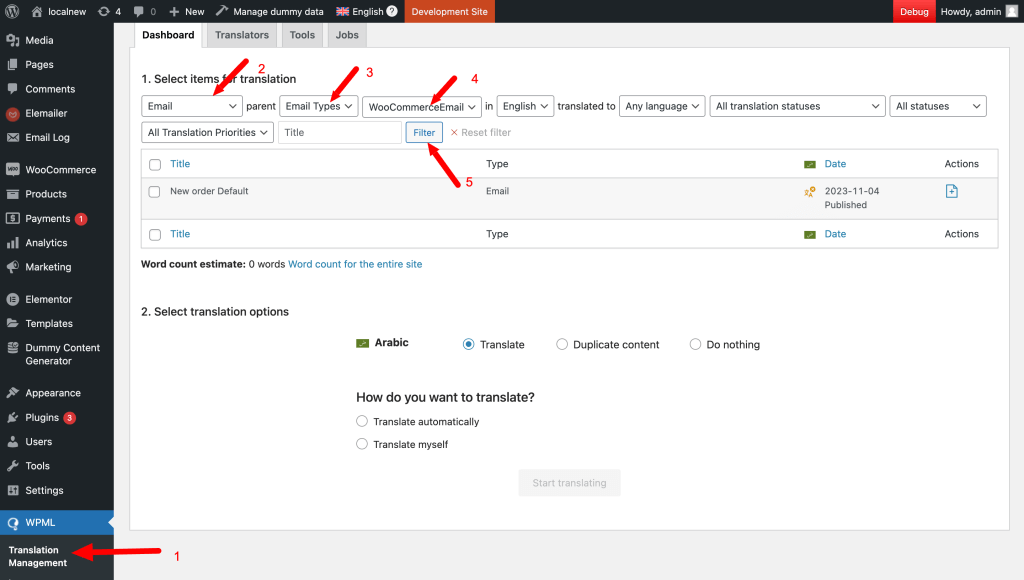
In newer versions, the translation management panel will show all your post types, so just use the collapsible to collapse everything except for the Emails tab as pointed out.
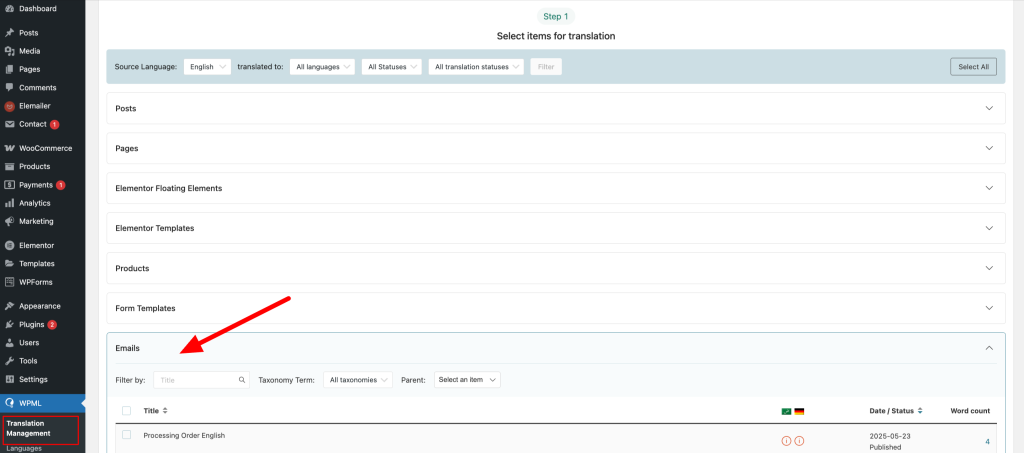
4.1.2. Select the template > Move and select the translation method. Most people would prefer duplicate content option as it gives you flexibility with the editing itself and in this case you can always change anything and layout too, if needed.
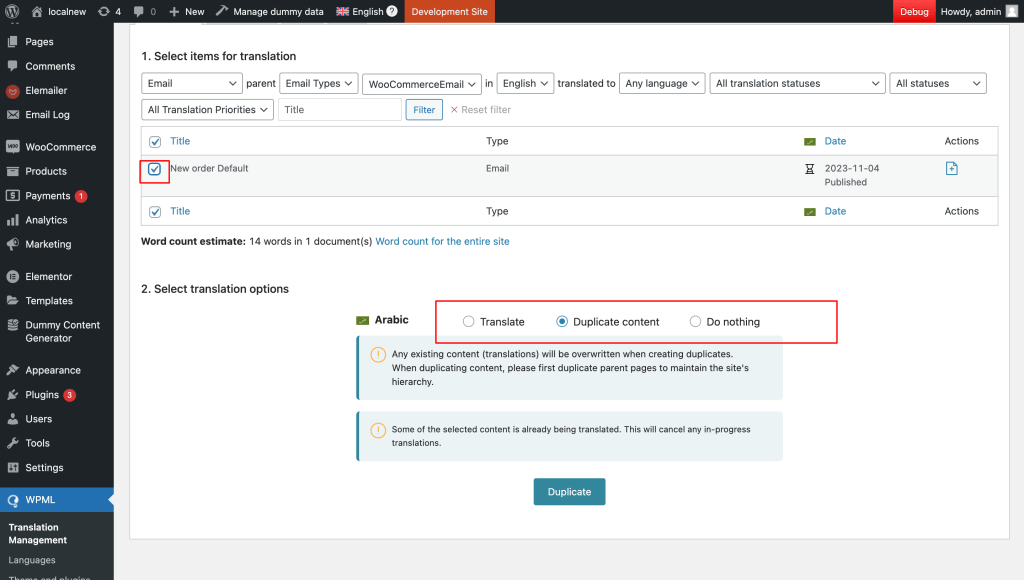
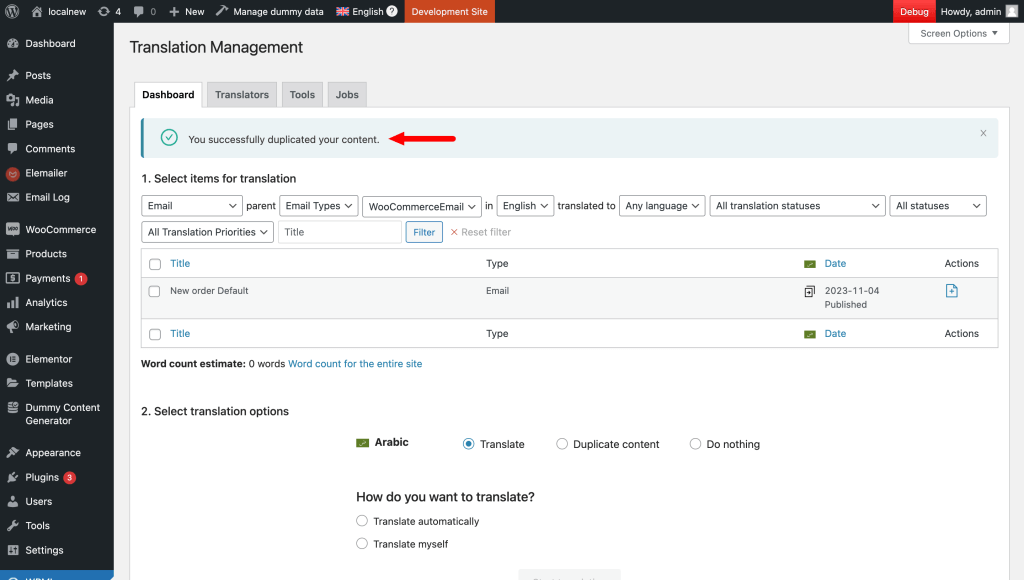
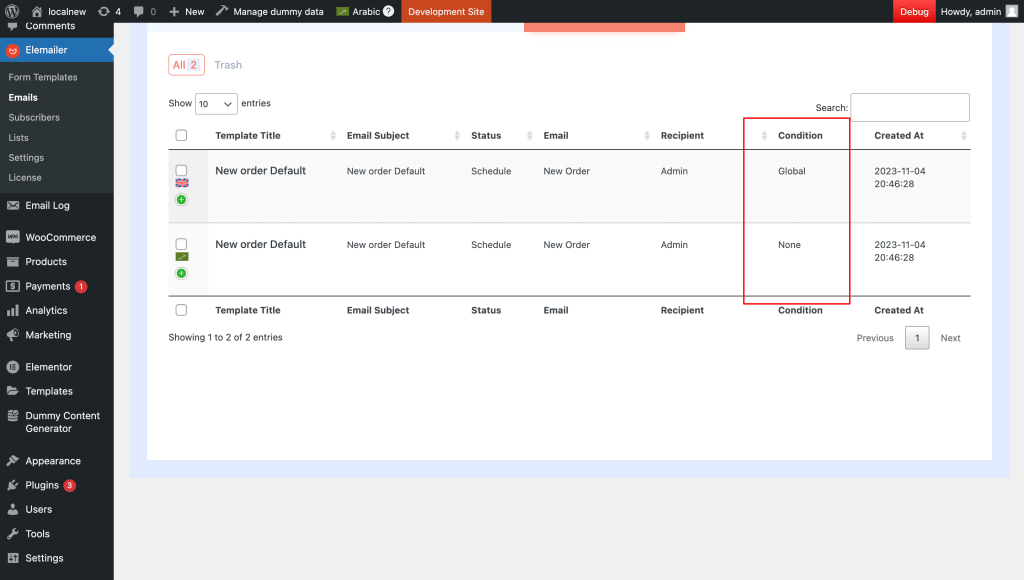
4.1.3. Now let’s go back to Elemailer Emails > WooCommerce tab and we should see the newly translated template there. Now we need to press Edit and remove the display condition from it as this is just a translated version and should not have any conditions in it. Remember if you don’t remove these conditions this template will be used for all languages ( as this was created newly and has higher priority ). But if you didn’t choose duplicate option when, you don’t need to do these and you can just skip to editing the template directly.
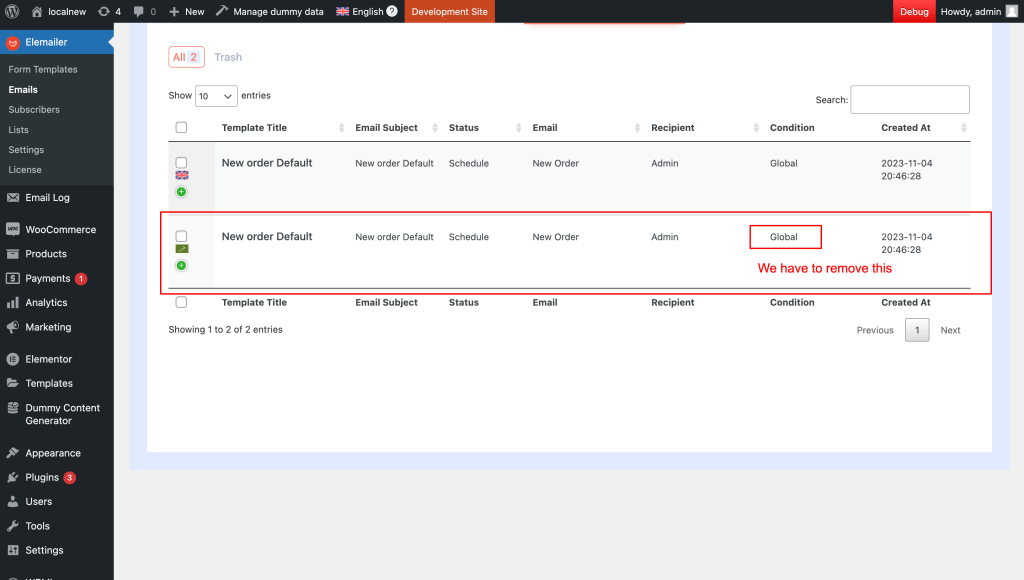
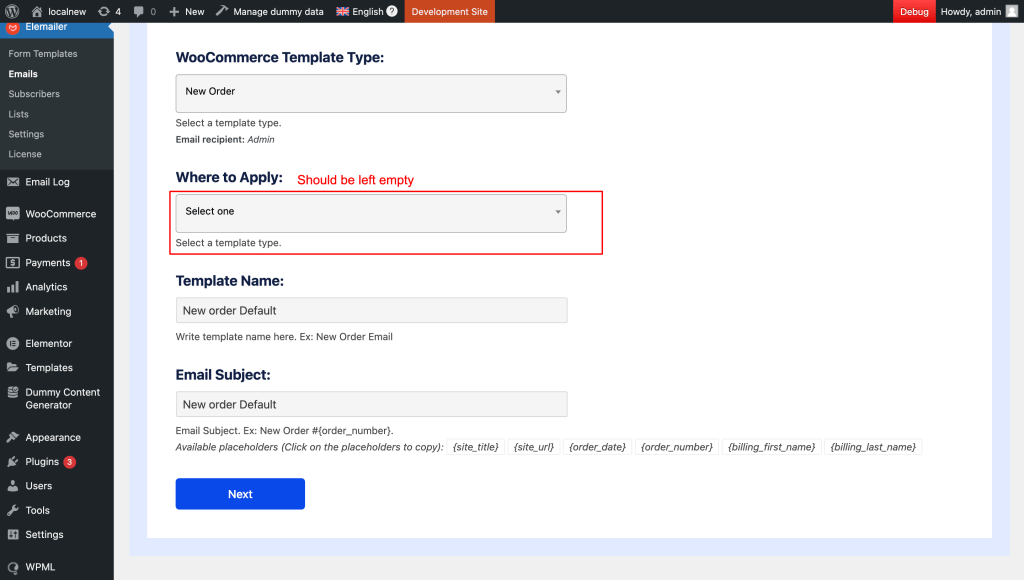
Remove the display condition by choosing select one in the where to apply option. Removing the template type selection is optional as it doesn’t have any impact in the end, but keeping it as it is will help you realize which template was for what type of email.
And check in the email template table to see that it worked.
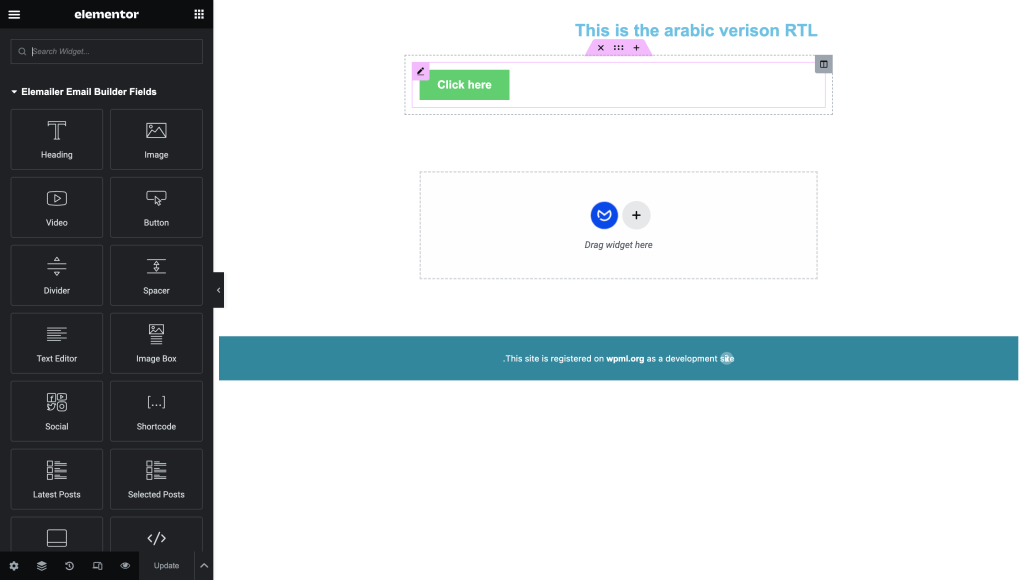
Now you can edit the template as you see fit and publish.
4.1.4. Click the preview icon and preview your template and from there select Edit email option above so that we can unlink this email from the original language so that both can be edited independently to avoid any issue as we use the duplicate method here. If you didn’t use duplicate option you don’t really need to do it. This depends on how you want to control this in the end.
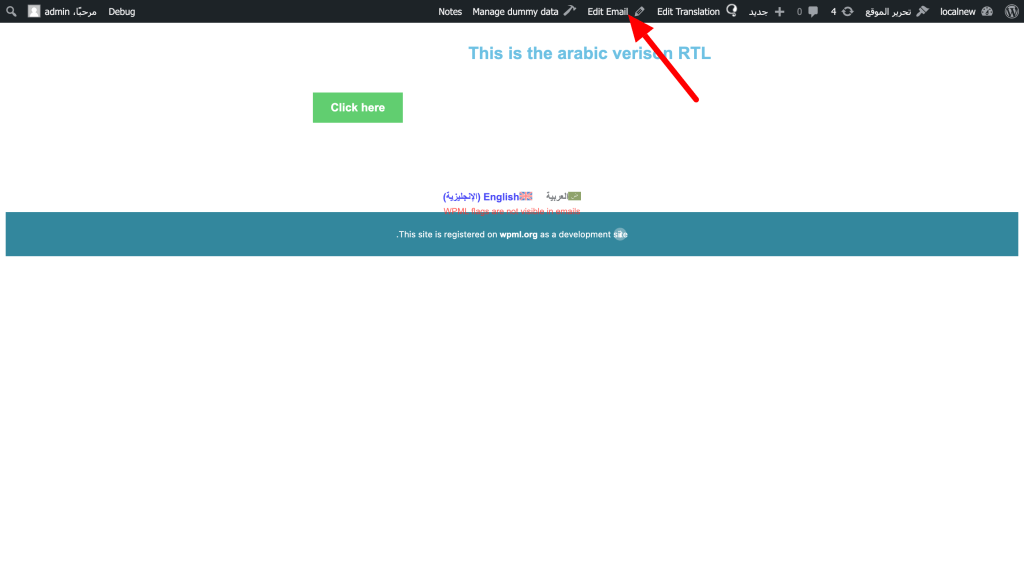
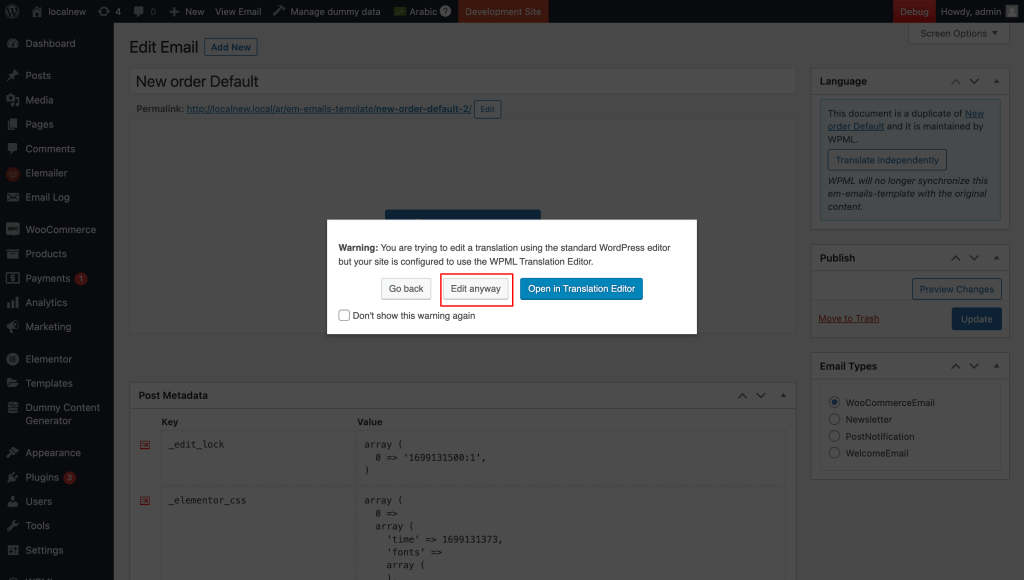
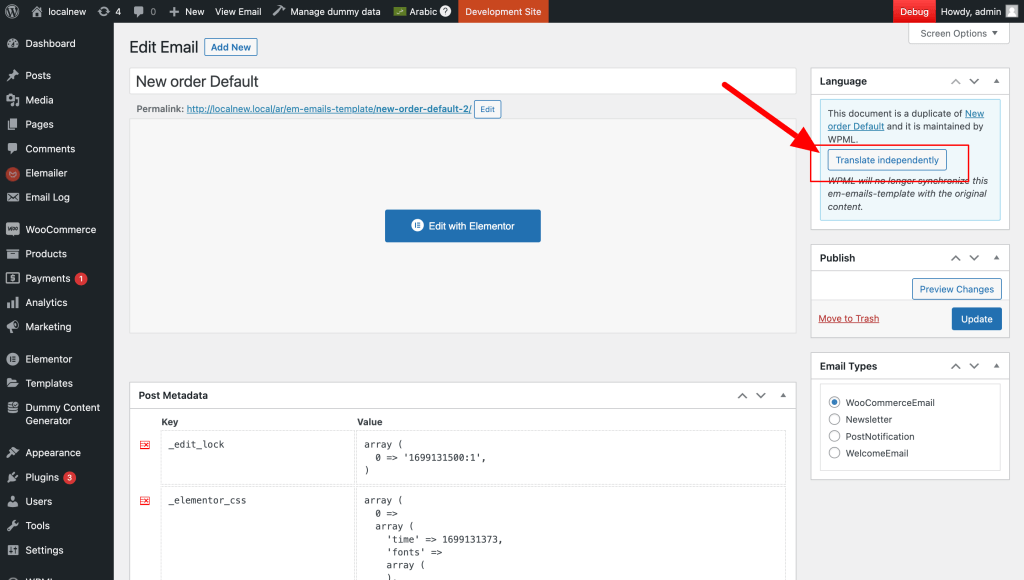
It’s best not to touch any other area such as changing email type.
4.2 (Method 2 ) From Direct editing of the template property: #
4.2.1. Go to Elemailer Email templates > Woocommerce tab and select Edit design option. It will open the design in a new tab.
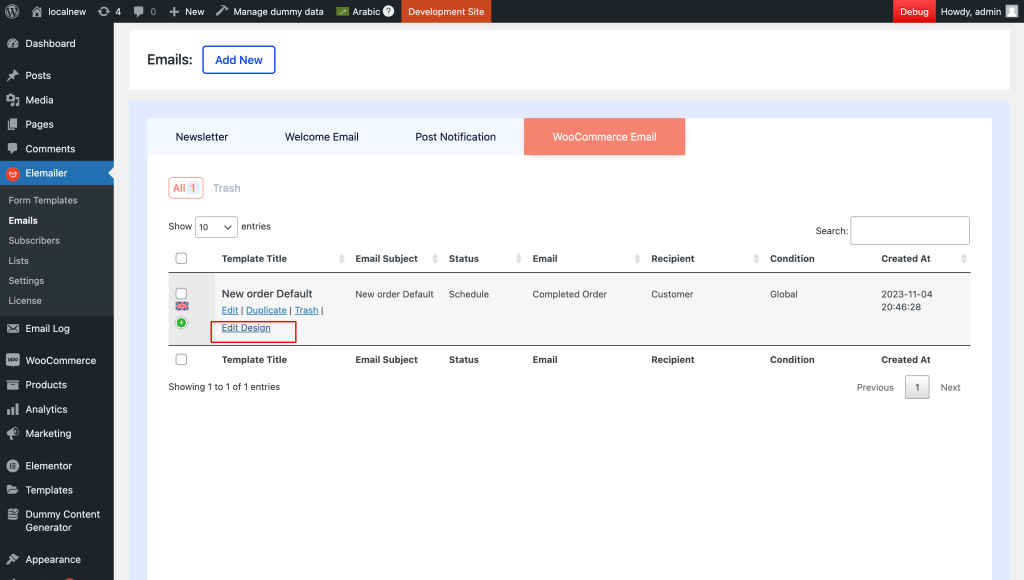
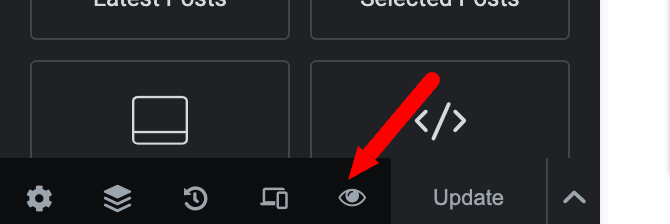
4.2.2. Use the bottom left panel’s preview icon to preview the tempalte and from there choose Edit Email option above and it should open up the default wp editing interface.

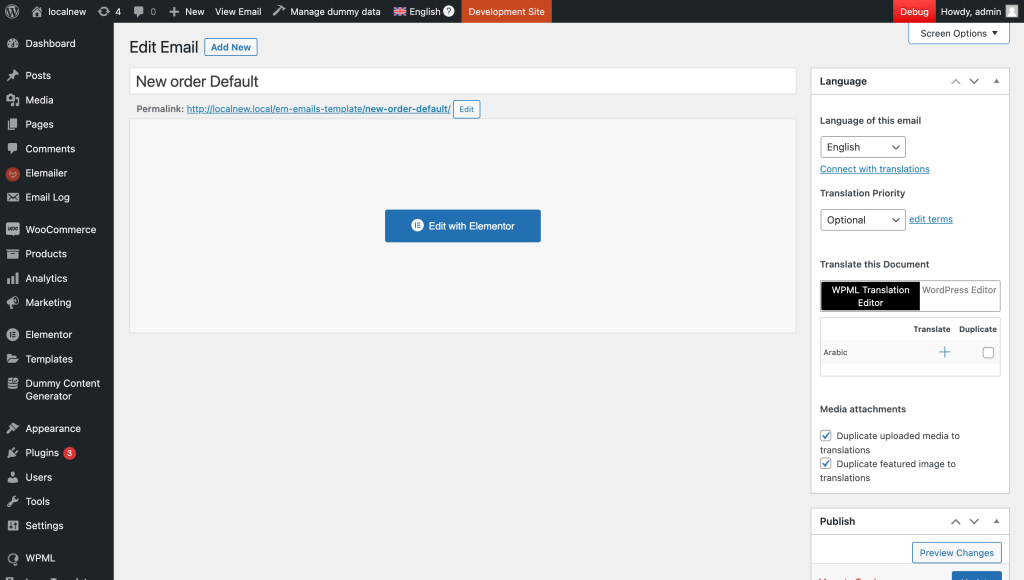
4.2.3. Now here you can see the WPML option to translate this page to another language by either duplicating or creating the translation manually / using string translation of WPML with the + icon. Select the option that fit’s your need.
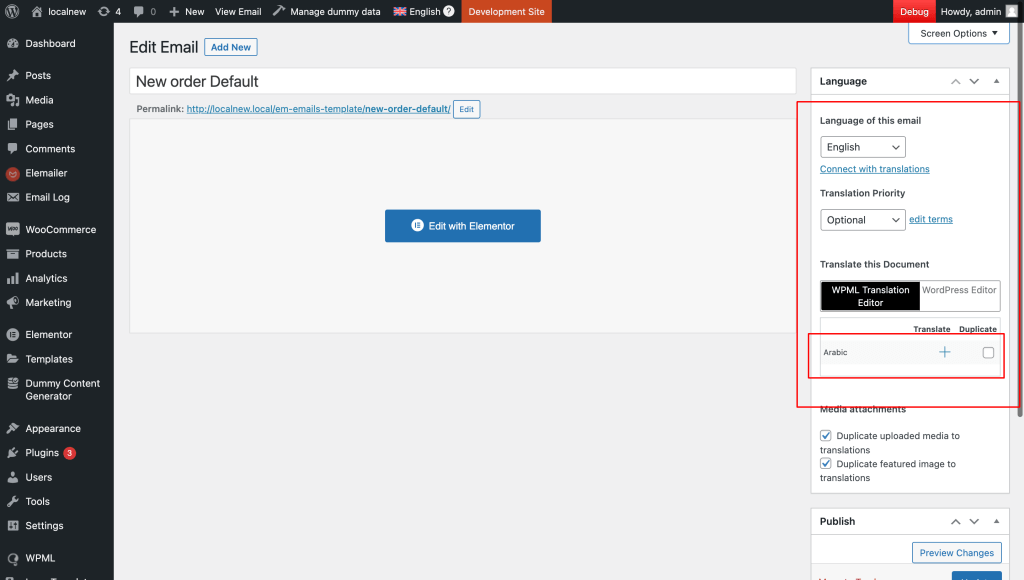
If you didn’t select the duplicate option, you should see the translation editor interface as usual.
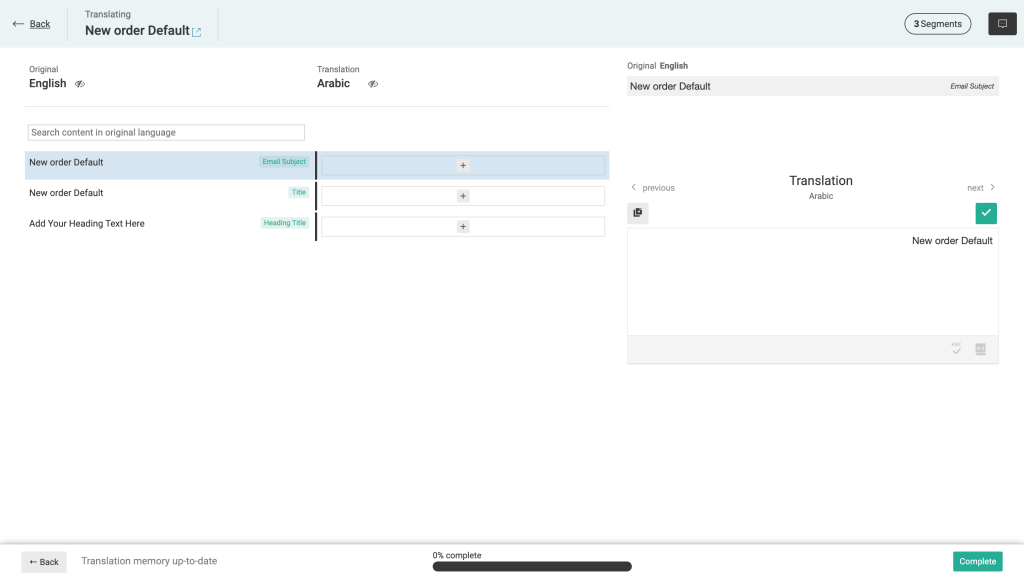
We suggest using the duplicate option > Then editing and detaching that email template from the original language like mentioned above in 4.1.4 point.

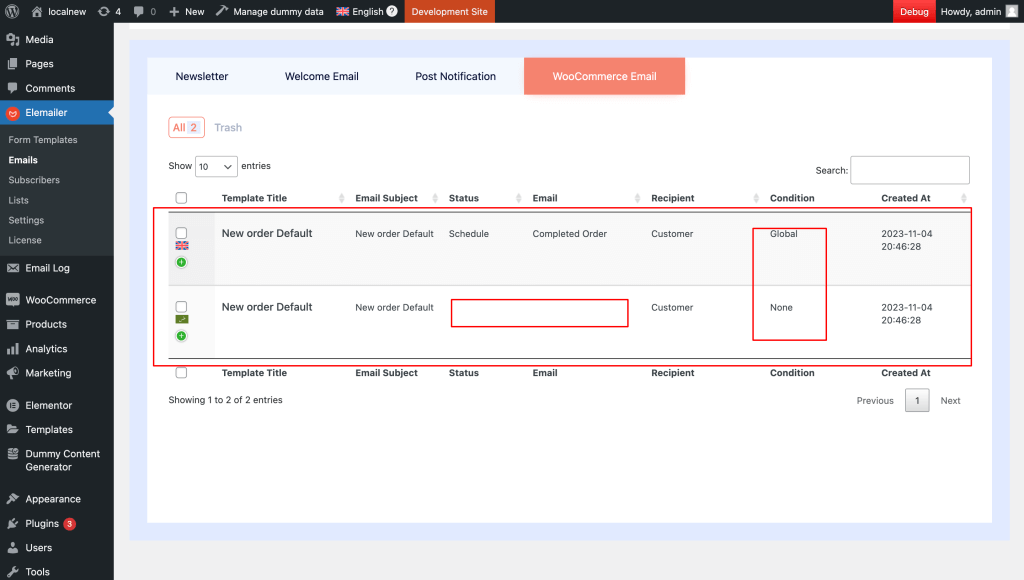
4.2.4. After the above is done you can go to the emails tab > Woocommerce and you should see something like this where display condition is none and some parts are blank and this is expected behavior.
All done.
Now test your setup by creating a test order from incognito to make sure your user’s receive emails in the desired language upon selecting wpml flag on your site accordingly.
The main point to remember in any WPML translation method above is that the translated versions should not have any display condition assigned to them. The condition will work according to the parent language’s condition.


